Table of Contents
Software Download
The NEJE software does not exist in isolation; it integrates the advantages of popular software like Lightburn and LaserGRBL and has made significant innovative features based on this foundation.
- NEJE win software NEJE software is a free software that is very friendly to beginners. You can use NEJE software to wirelessly manage multiple devices, and it can also be used as a “bridge” to wirelessly connect the lightburn and LaserGRBL software with NEJE devices to improve work efficiency. The software is constantly upgraded and updated free of charge via OTA. Install Driver(The old Win system needs to be installed, Ignore if driver is already installed).NET Framework 4.8 — Win software operating environment, Ignore if win10 and above
- NEJE APP for Android v3.0.3.apk | Download from Google Play Store (Support OS: Android 5.0 or later)
- N-Scanner APP for Android (mainly uses the fast transmission between the engraving materials in your mobile phone and the NEJE Win software. You can directly shoot the image or file through the mobile phone or quickly transfer the content of the photo stored in the mobile phone to the computer for editing and engraving)
- "NEJE" APP for iphone, iPad, macbook Support OS: iPhone (iOS 10.0 or later), iPad (iPadOS 10.0 or later), Mac (macOS 11.0 or later)
NEJE Win Software
“REC” for lightburn and laserGRBL
NEJE devices support the “REC” reception function for Lightburn and laserGRBL software, receiving all data before starting work, thus no longer occupying the computer.
How to use offline work on LaserGRBL
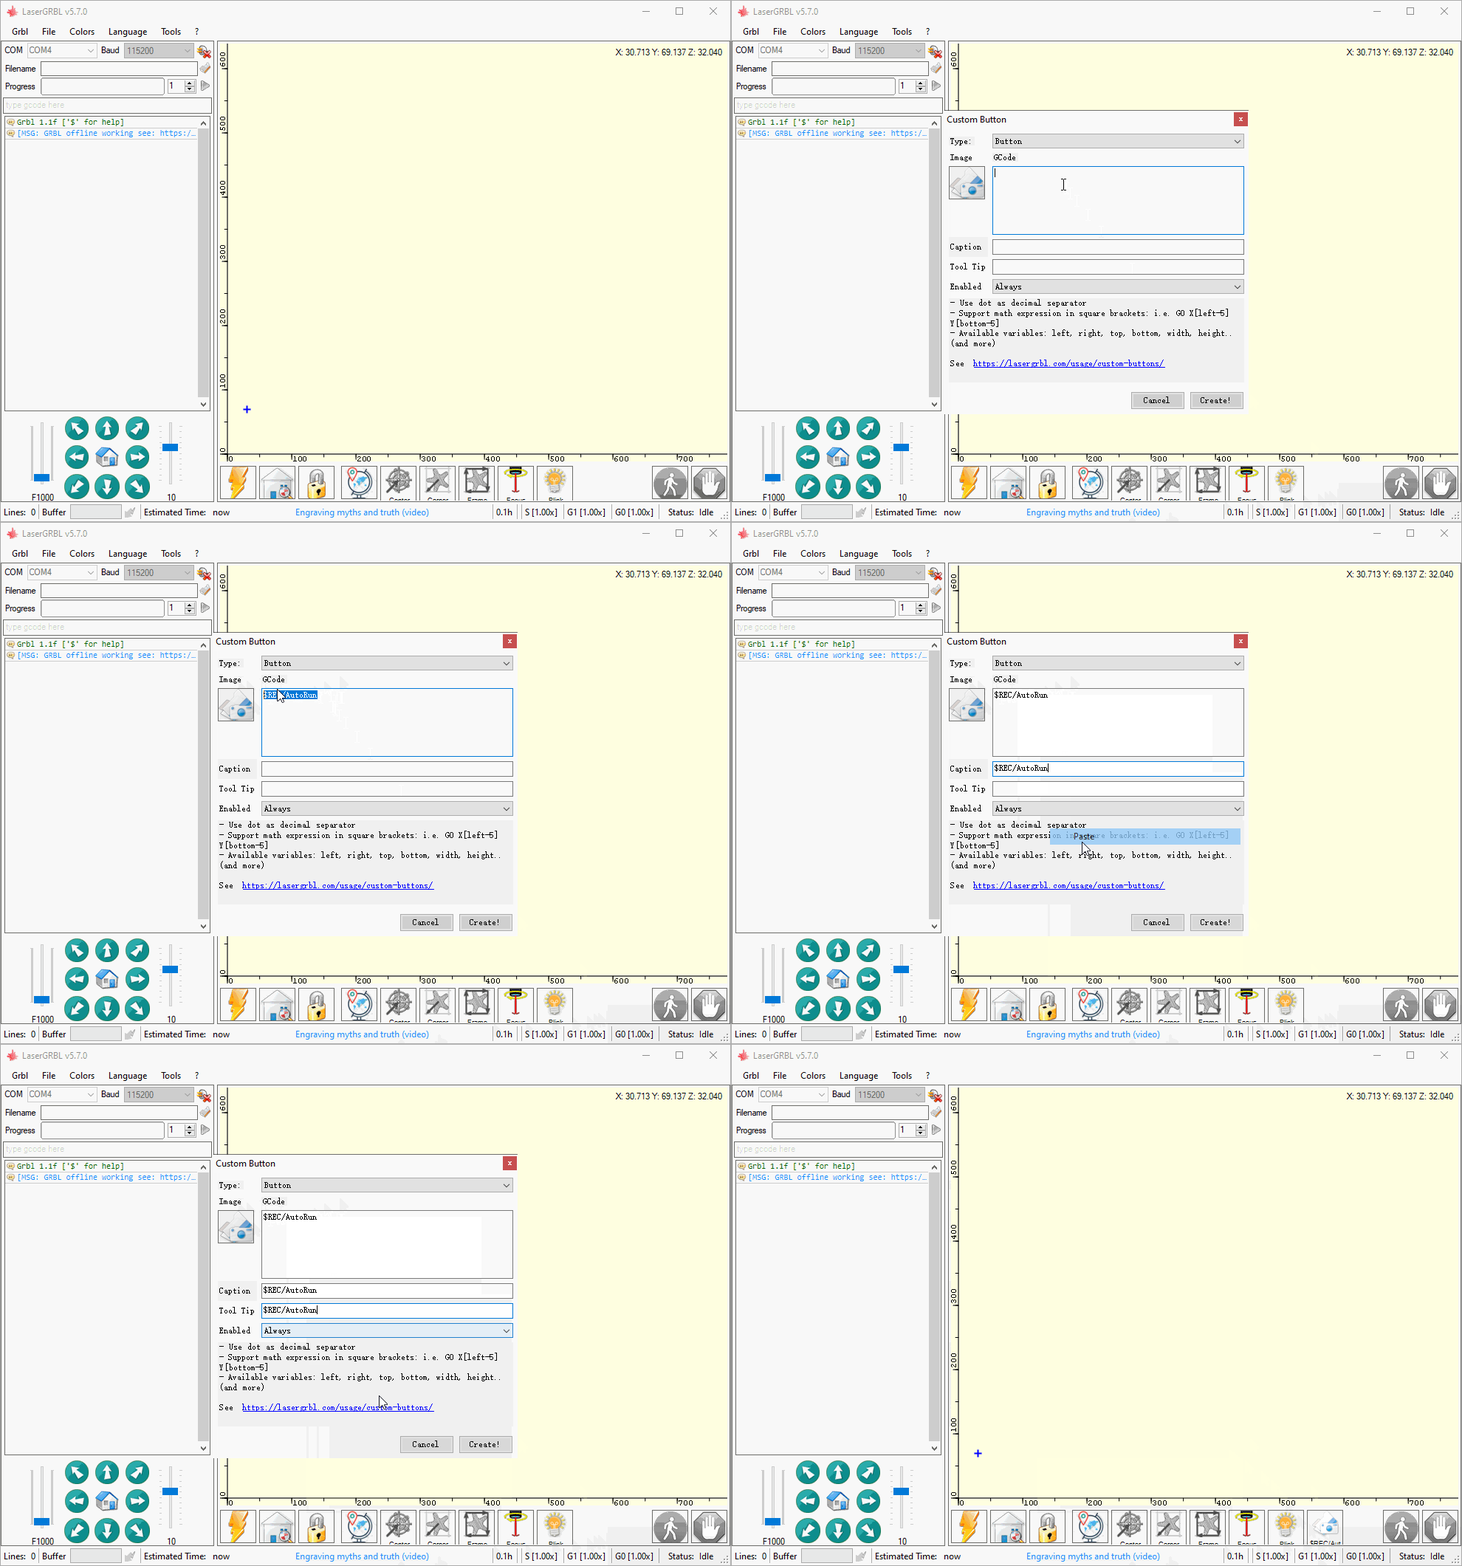
Step1: Add Custom Button
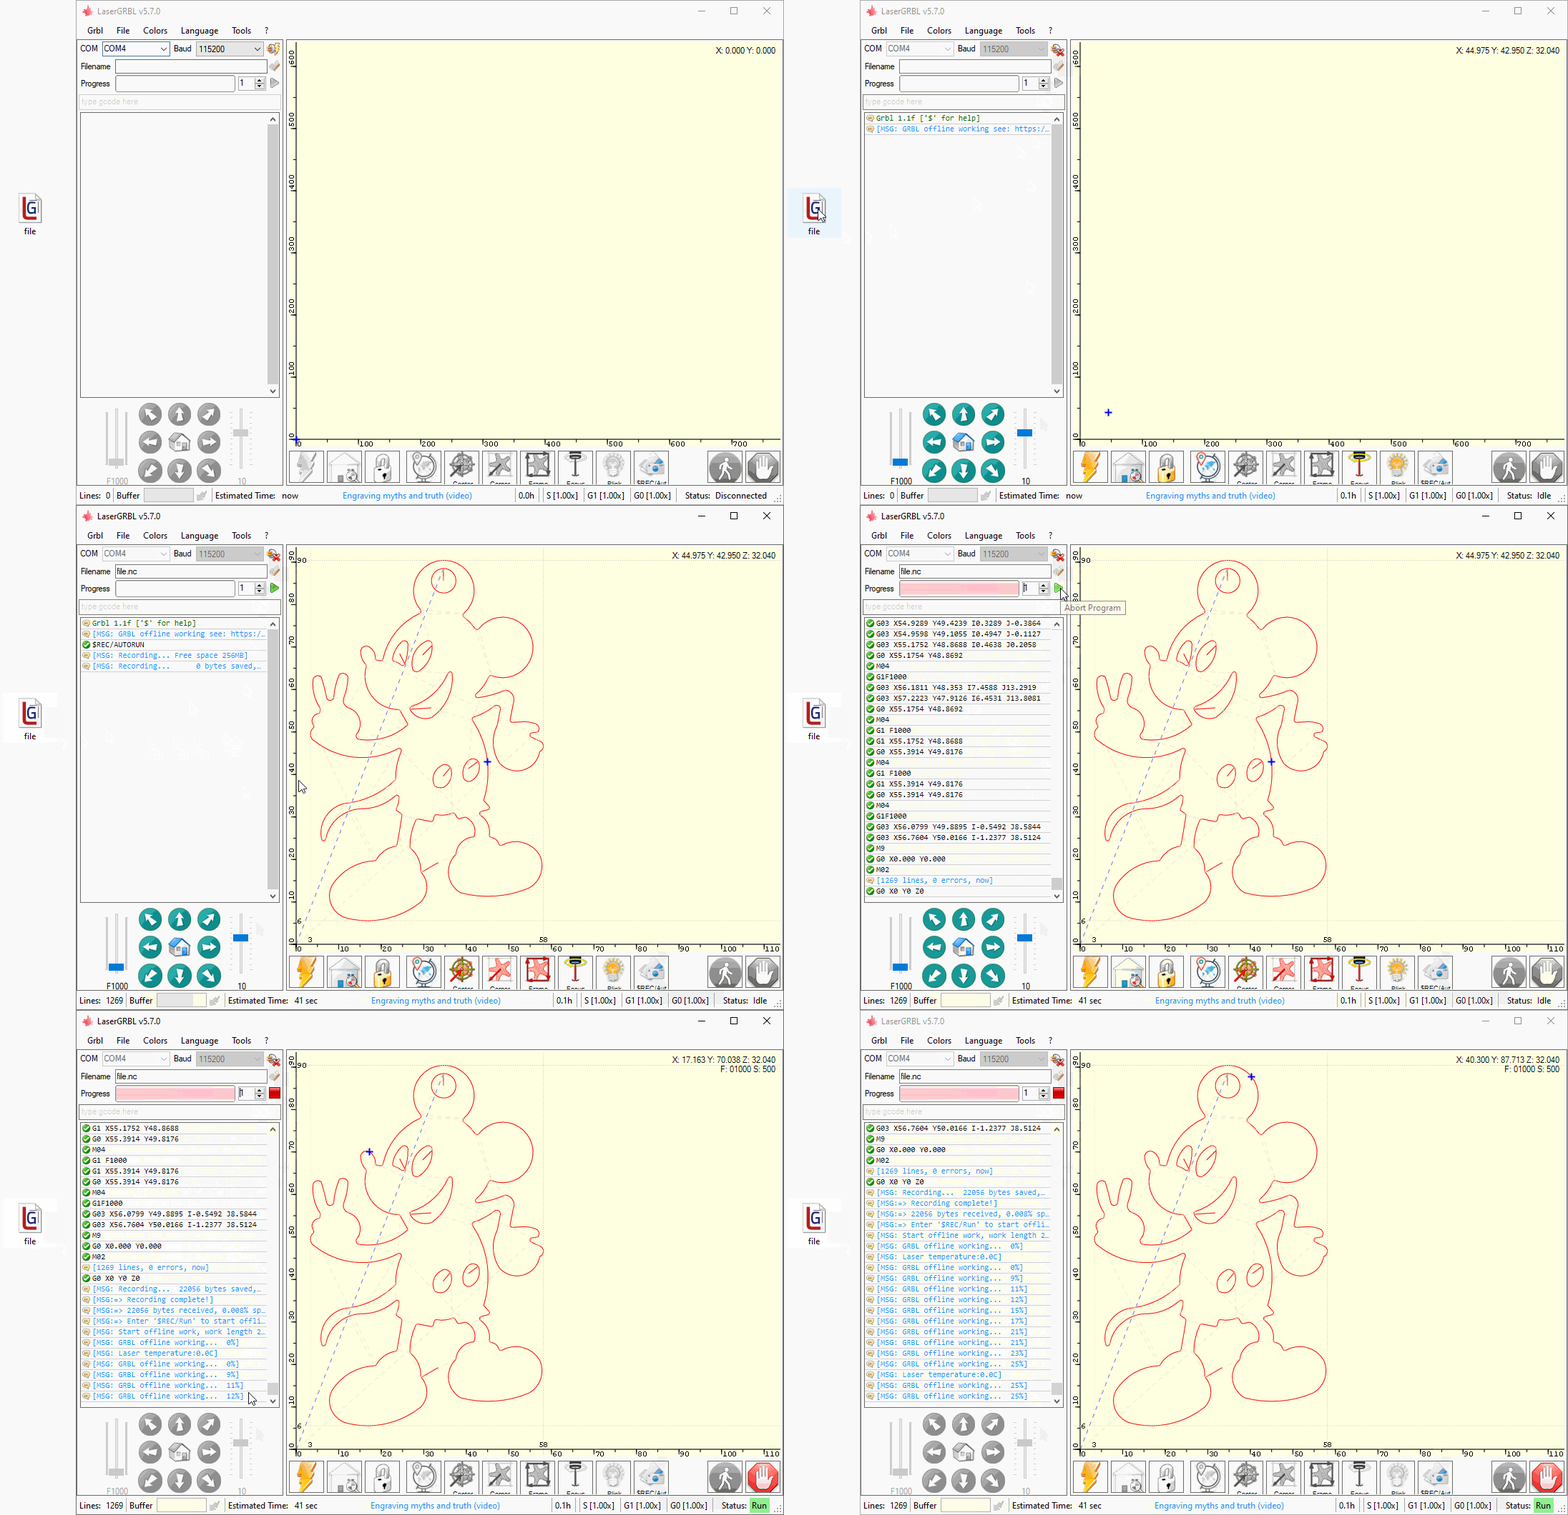
Step2: Start a offline work
More info about custom buttons please click here.
Frequently Asked Questions
MSG: Not all data is saved, can't start offline work. / Warning! space used, bytes not save.
The work data is too long and all content cannot be saved. Please change the work data. or Buy a new control board at this link,you can get a $20 automatic discount at checkout, new control board have 256MB storage space.
How to cancel sending data during the sending process
Lightburn: Click Stop button LaserGRBL: Click Grbl Reset button (with a lightning icon)
How to pause work in an offline work project
Send the command !
How to resume paused offline work
Send the command ~
How to cancel ongoing offline work
Lightburn: Click Stop button
LaserGRBL: Click Grbl Reset button (with a lightning icon)
Is it necessary to work with the connection bridge for offline work?
Not necessary.
Sending offline work can work with the connection bridge, but it is not necessary because it only requires a stable USB connection during sending.
Can Bluetooth be used to transmit offline work data?
Yes, but it is not recommended to use Bluetooth to transmit offline work data because USB transmission speed is 50 times faster.
"Bridge" for lightburn and laserGRBL
The NEJE software has designed a “bridge” function for Lightburn and laserGRBL, allowing the Lightburn software to operate wirelessly without the restriction of a USB cable.
Complex Processes
Multi-layered complex processes. The new version of the NEJE software has developed multi-layered complex process functions, where each process can control everything from scanning, M8/M7 pre-start and end times, Z-axis status, and even enable Gcode functionality, meeting the needs of professional users.
Multiple Devices Management
Wired/Wireless management of multiple devices. Normally, a lightburn software can only control one device in real time. Then NEJE engineers skillfully combine multiple devices with lightburn and laserGRBL software to achieve fast management and project production of multiple devices. This is the uniqueness of NEJE multi-device management.
"N Scanner" APP
“N Scanner” APP directly transfers images from your phone to your computer, making creation easy and quick.
Start with APP
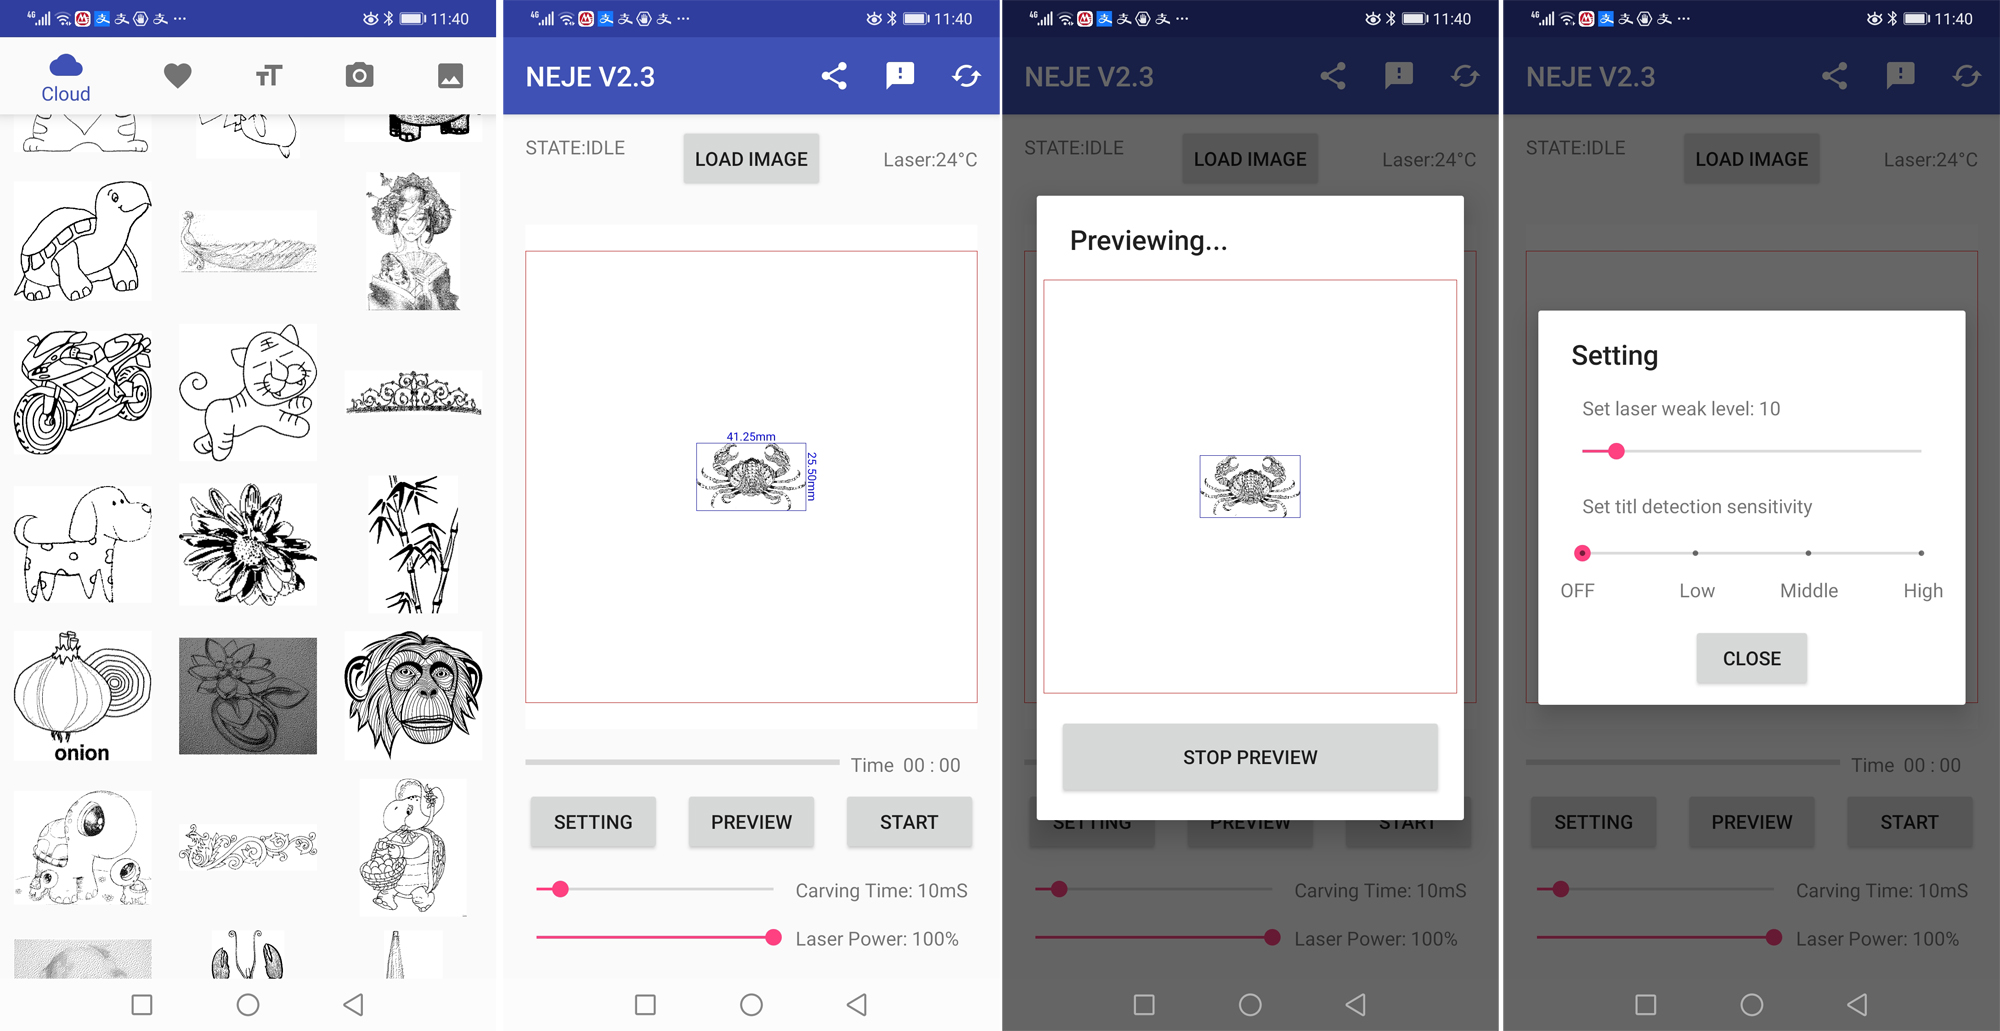
NEJE has developed Apple and Android apps for NEJE devices, which are directly used for content creation, making it easier for beginners to get started.
Configuring LightBurn
First: prepare your device
1.We recommend baudrate 115200 firmware, so flash your firmware to 115200 baudrate.
2.Make sure your device is at IDLE mode or GRBL mode. How to know my device mode?
Second: prepare lightBurn software by following steps
Start with Lightburn
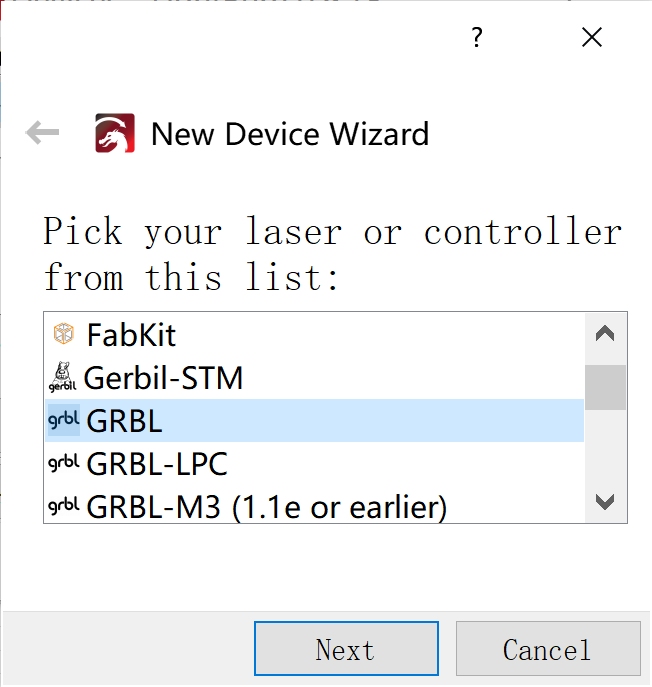
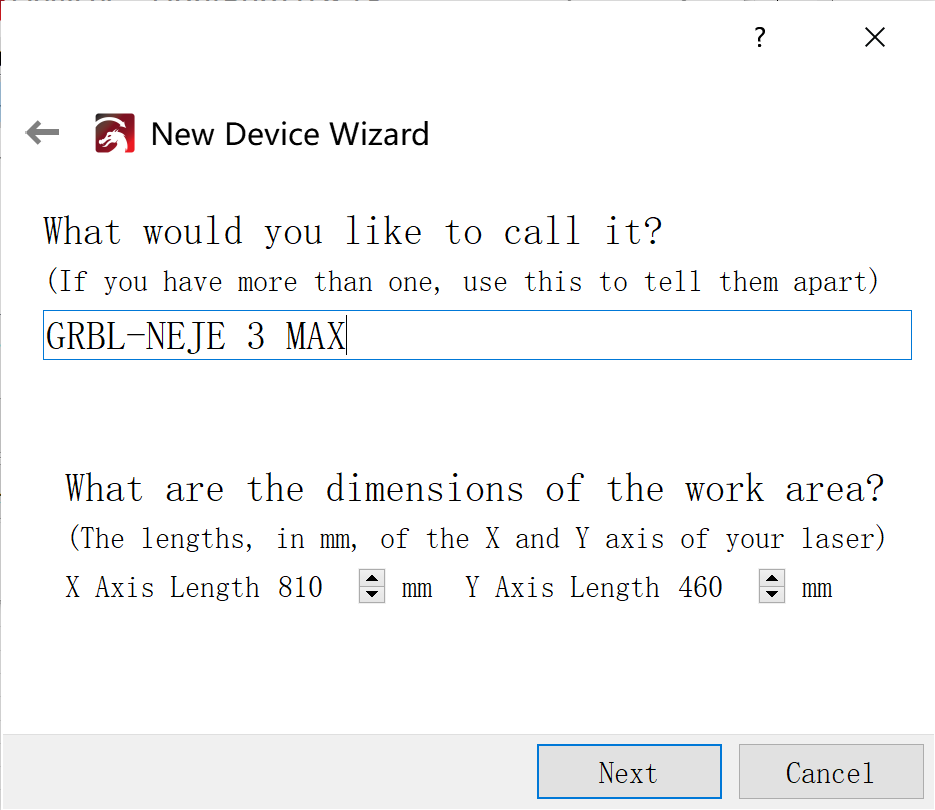
Create Device
Area setting: X: 750 Y:460 (If your device is NEJE Max 4)
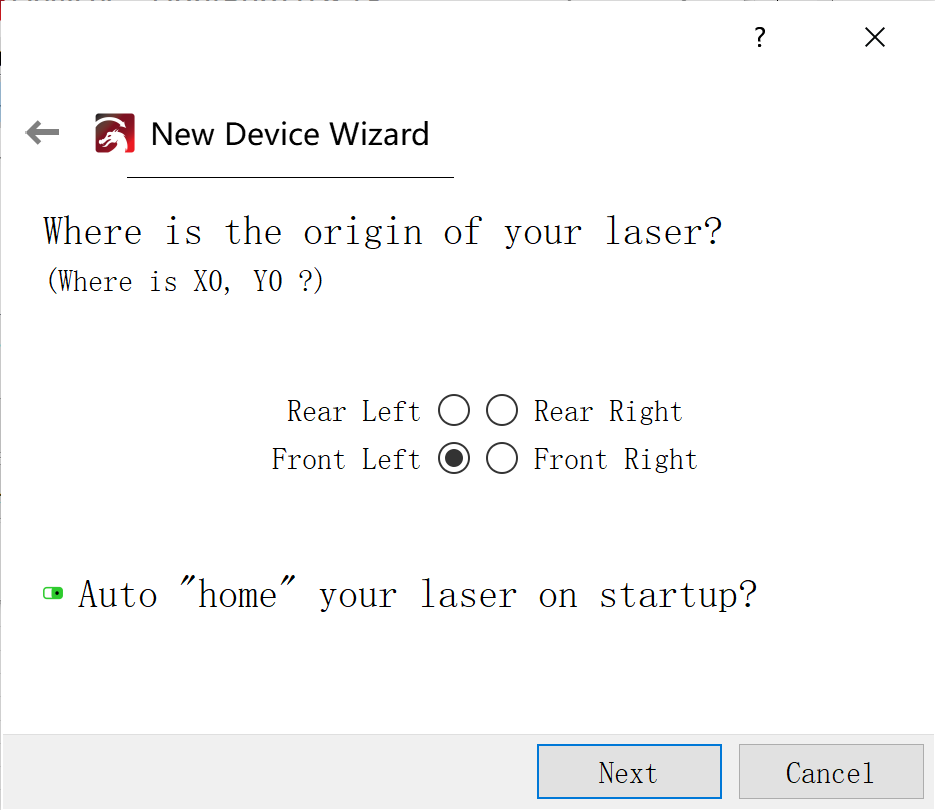
Origin X0,Y0: Front Left. Auto “Home”.
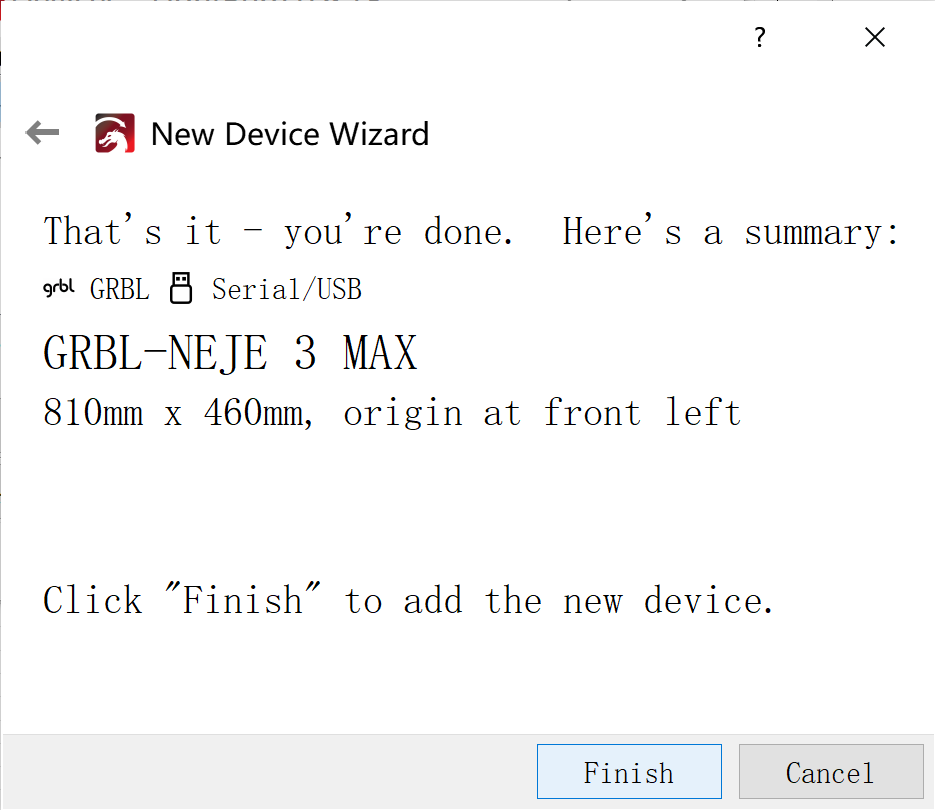
Finish:
How to start M7, M8, Door
In the new NEJE Win software control mode, M7 and M8 can be set individually for each layer, and you can also set the advance start and end times for M7 and M8. The NEJE software adds more advanced features to each layer, including the ability to accept G Code, for expanding more functions.
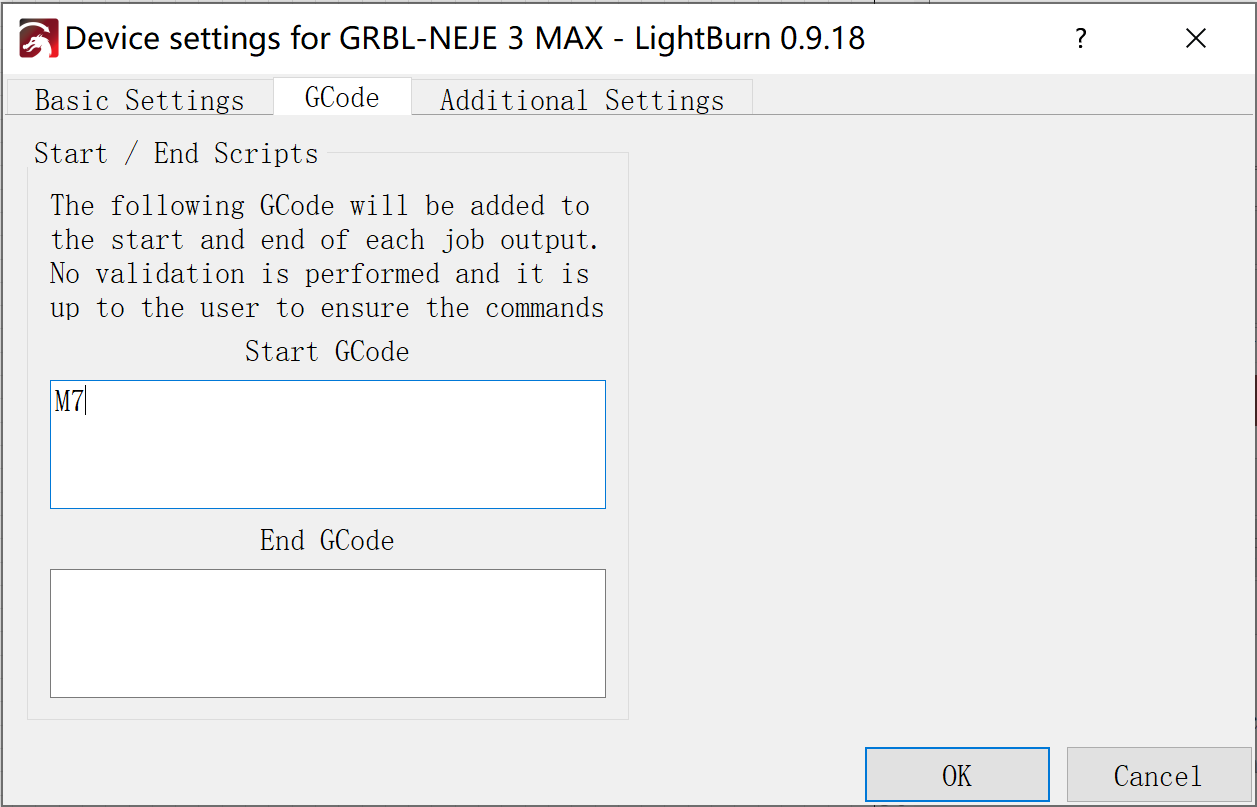
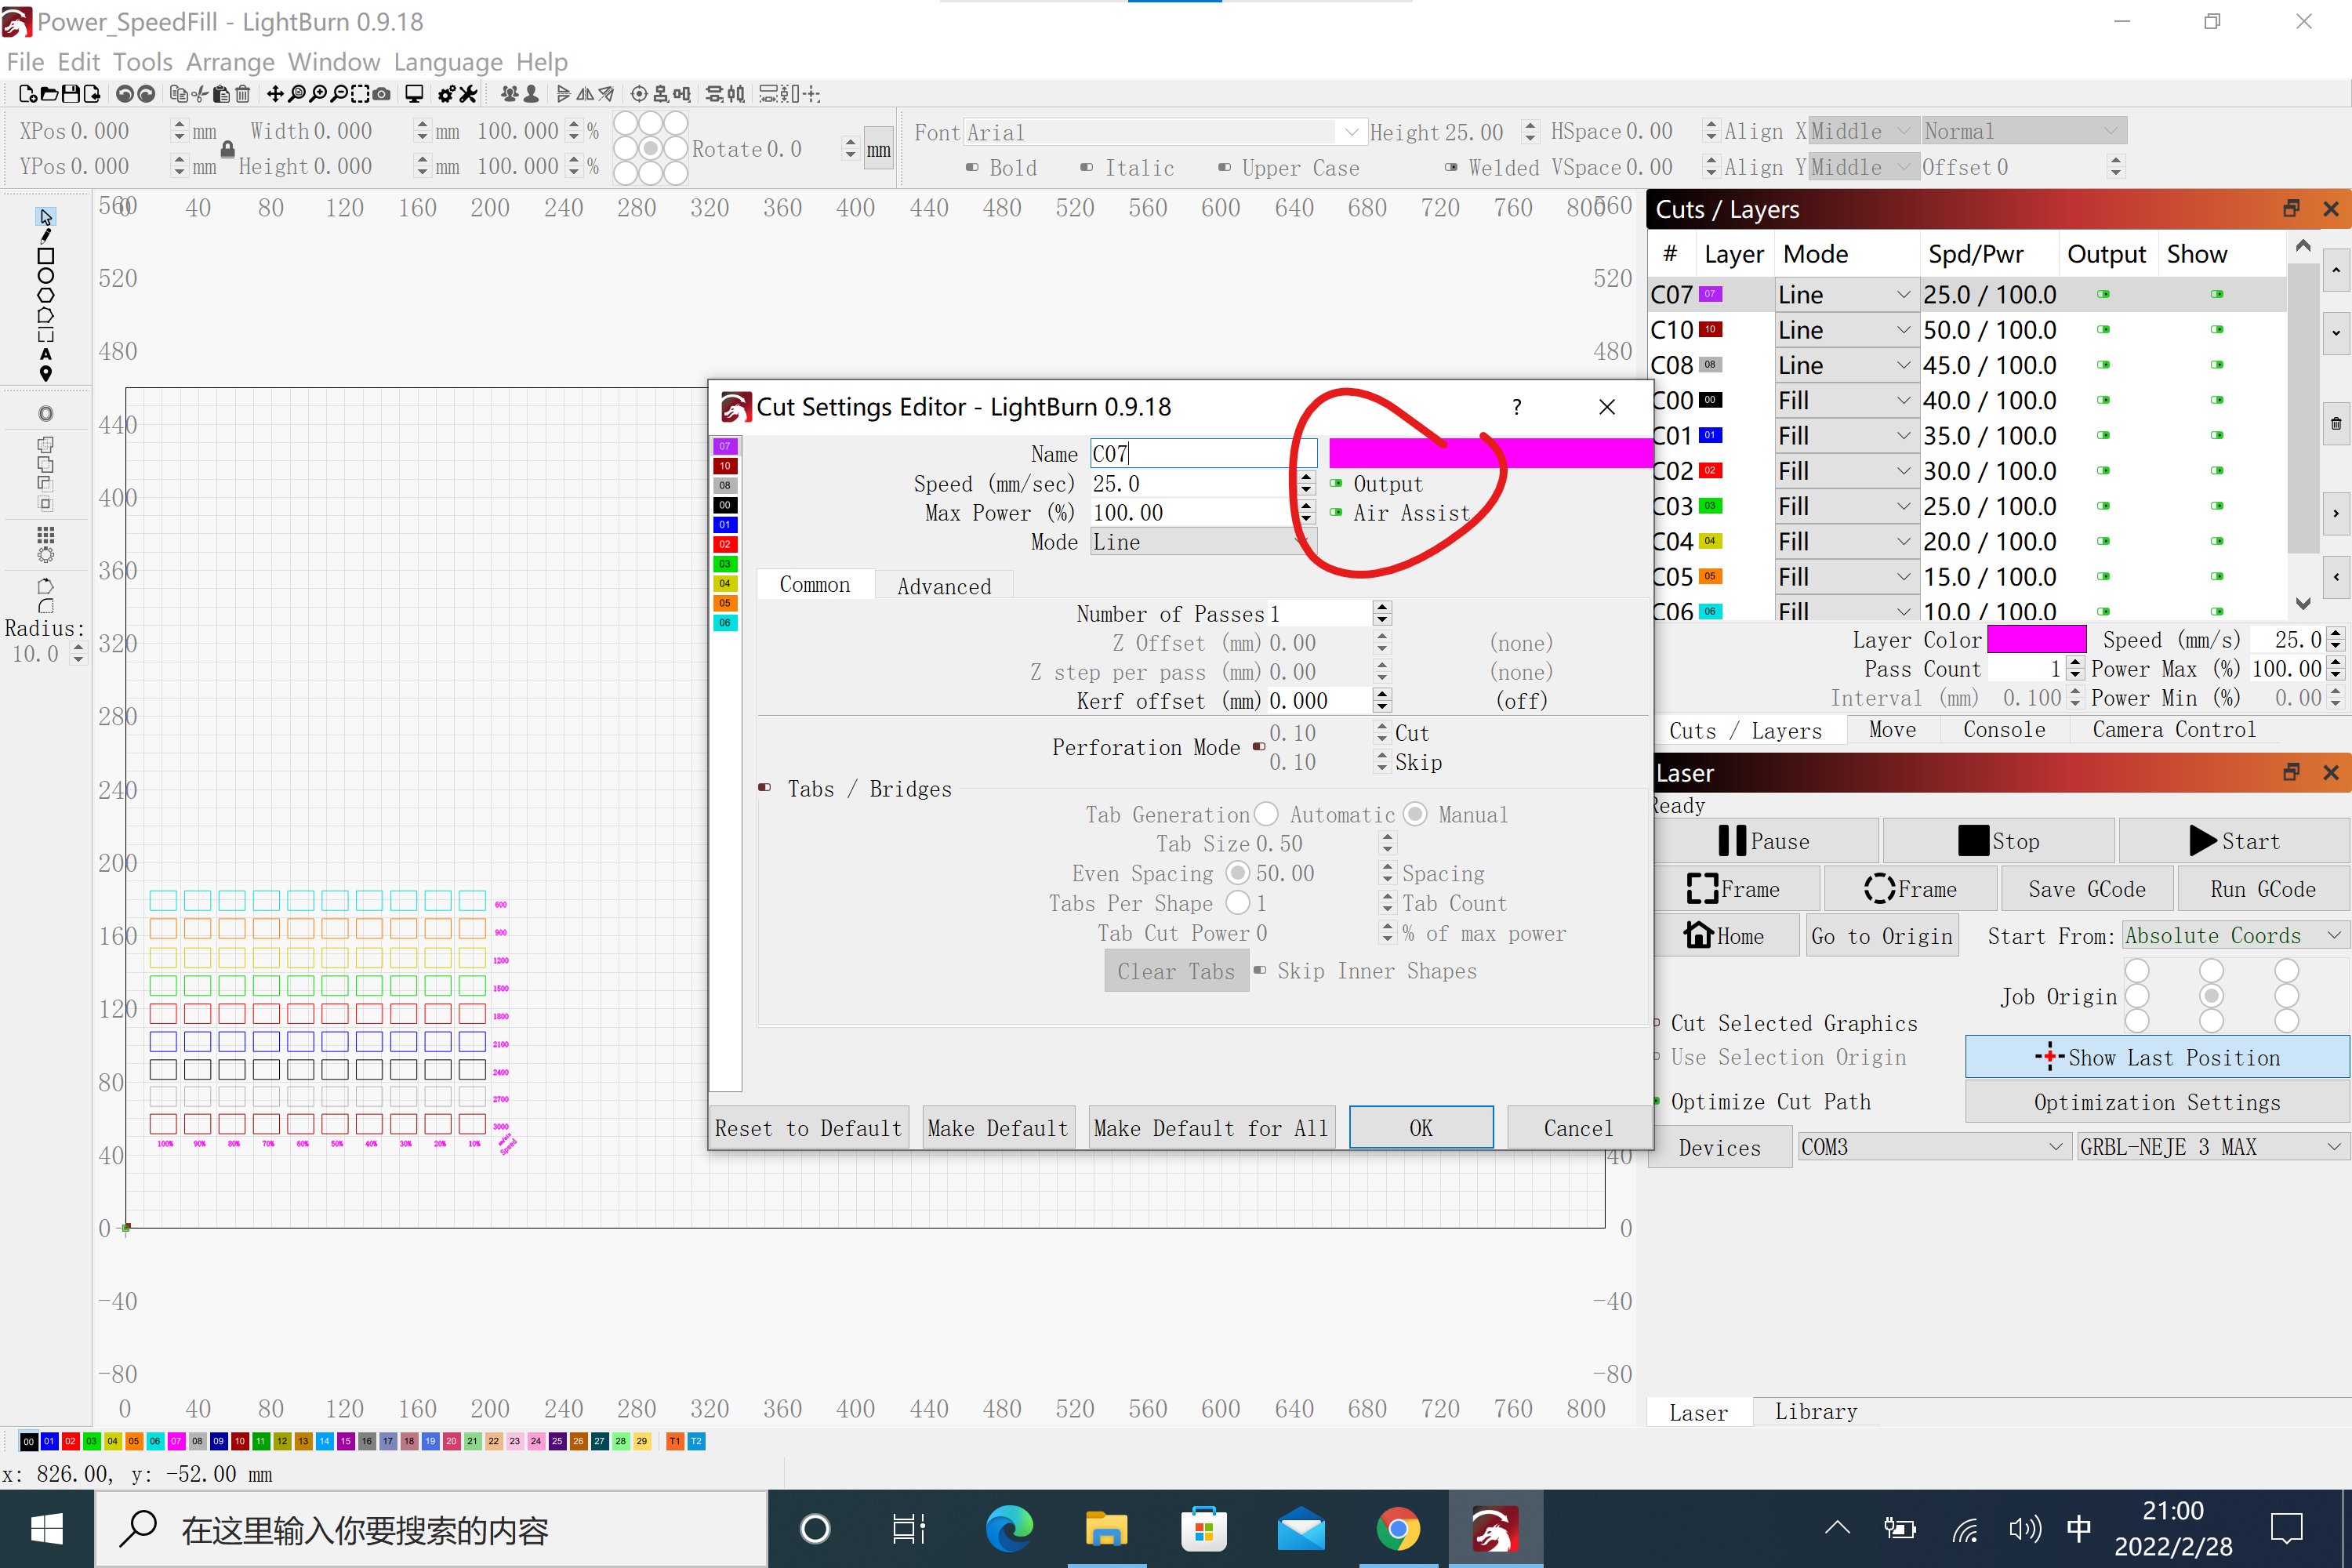
Lightburn has different settings for M8 and M7:
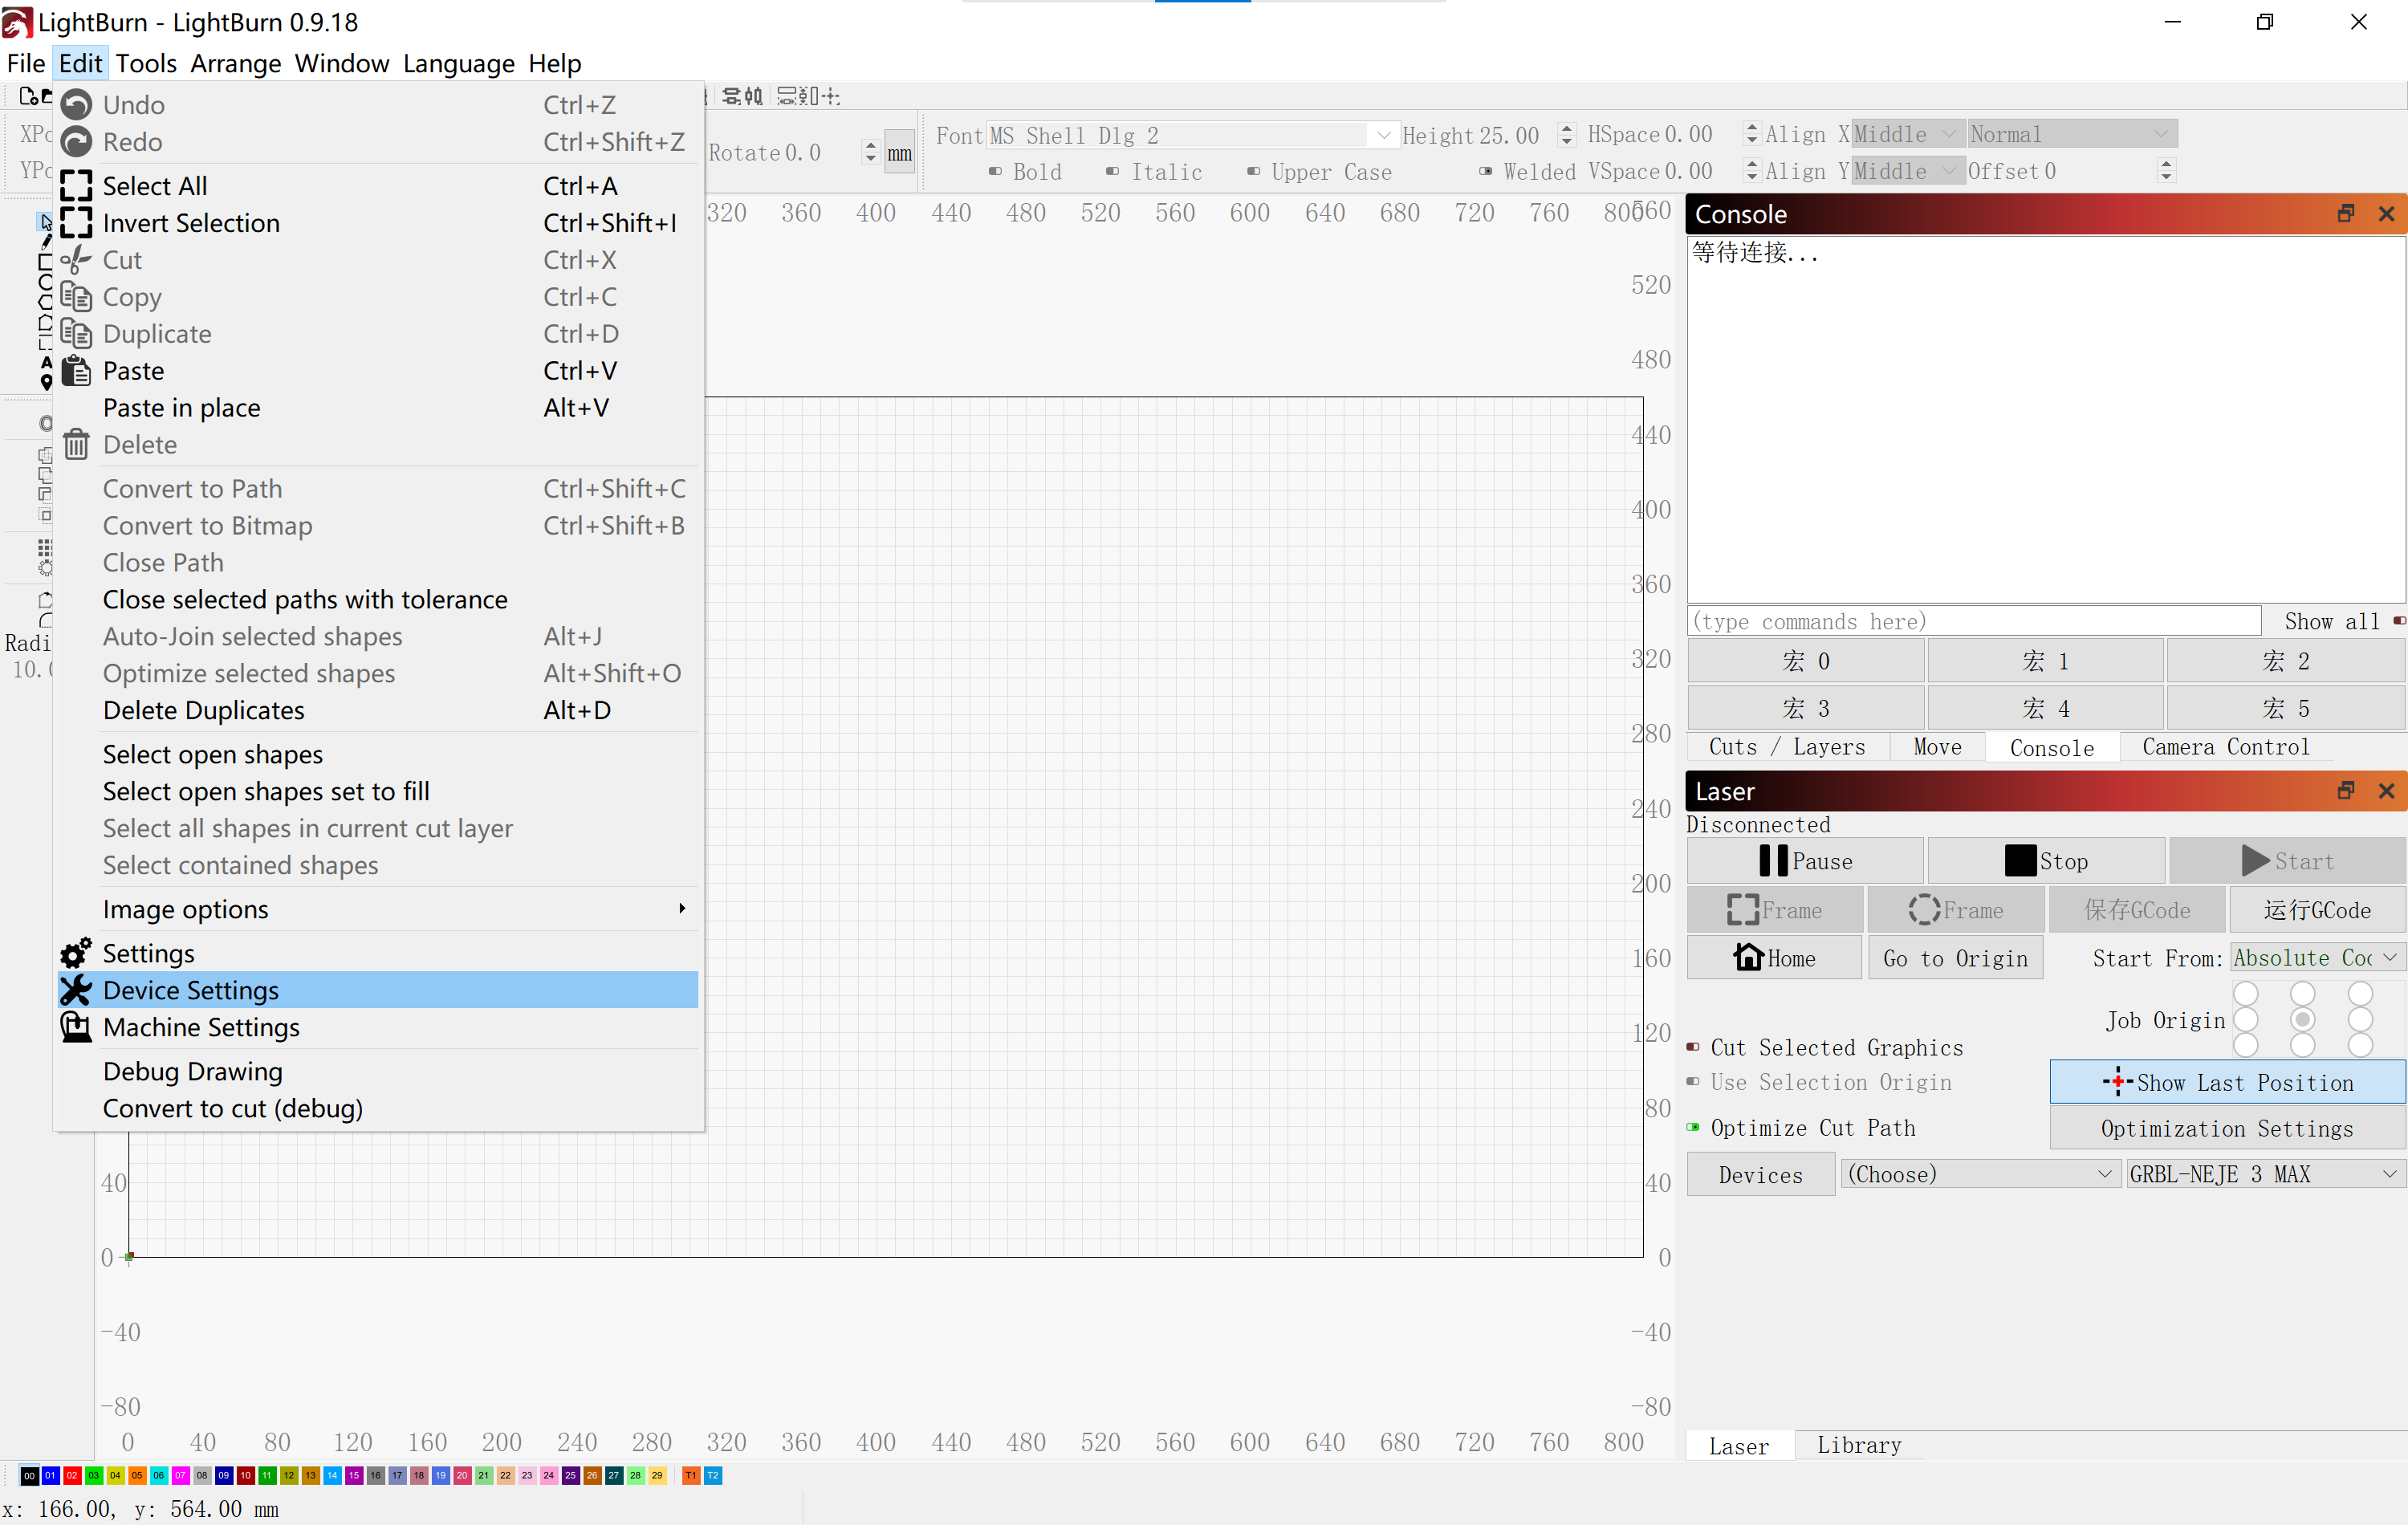
Device Settings
Start G-code: M7
“Air Assist” - M8
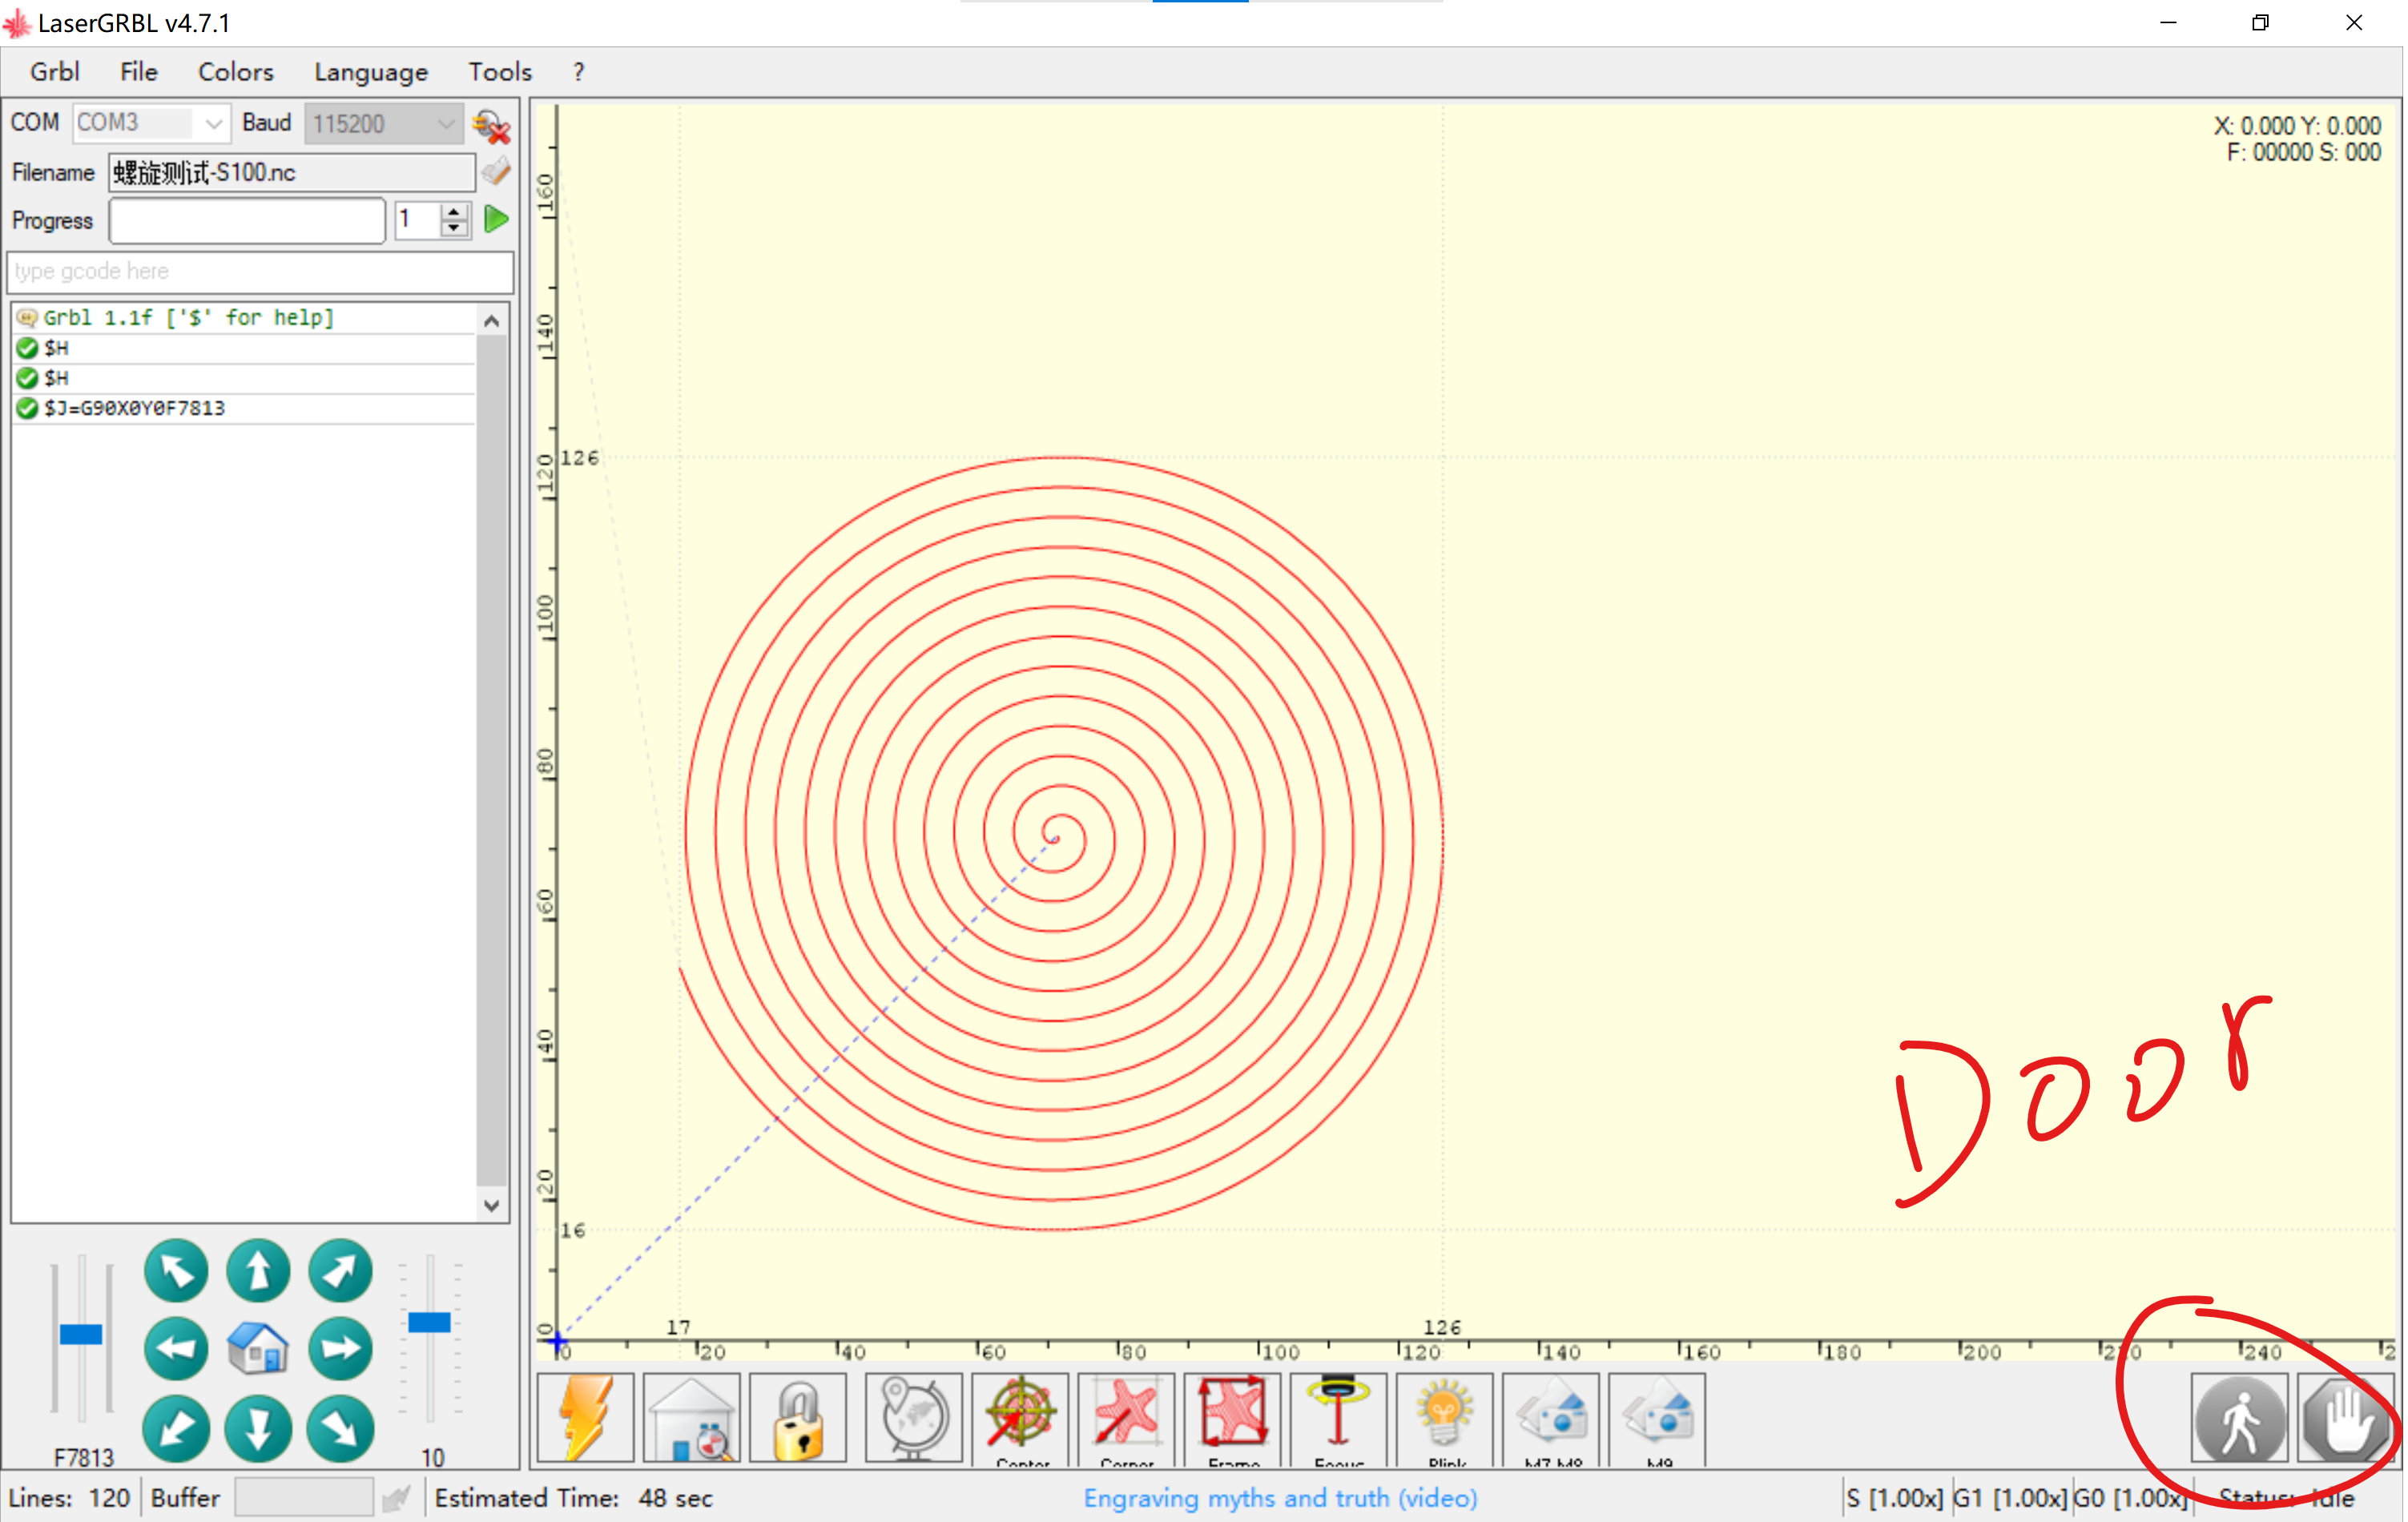
For the use of Lightburn software, please refer to the Lightburn official documentation. It should be noted that the M8 function needs to be turned on in every layer setting of Lightburn, and after each layer is executed, the M8 control valve will automatically close. The M7 requires separate manual setup; in the Lightburn control environment, it is used as a global function and can be turned off with the M9 command for both M8 and M7 interfaces. Lightburn's implementation of the GRBL Door function is not complete; under Lightburn control, you can use the door to stop urgently, but engraving cannot be resumed after stopping. In contrast, in NEJE software and laserGRBL environments, work can be resumed after the Door function is activated.
Low Light Configuration
Low-Light Positioning Adjust the suitable low light through the software. The NEJE mode can be adjusted in the “Settings” column of the NEJE Win software; the GRBL mode can be adjusted in the “Grbl Configuration” of the laserGRBL software, which has been explained above.
Put a gray cardboard on the surface of the white material (such as plywood) as a focus reference to find the precise focus. A fine focal point can be observed through the protective goggles or the shade of the module.
–Why NEJE software does not require cross hairs?
Many traditional users have a cognitive inertia that laser equipment always needs crosshairs for positioning. However, for diode lasers, it is a visible wavelength, and even IR lasers can be combined with red lasers to help positioning, so this is very different from CO2 laser equipment. When the NEJE team designed the first diode laser 10 years ago, they used the weak light display as a positioning operation method by designing firmware. The weak light position is the actual laser position, so it can innovatively control the engraving position accurately through point positioning and box positioning.
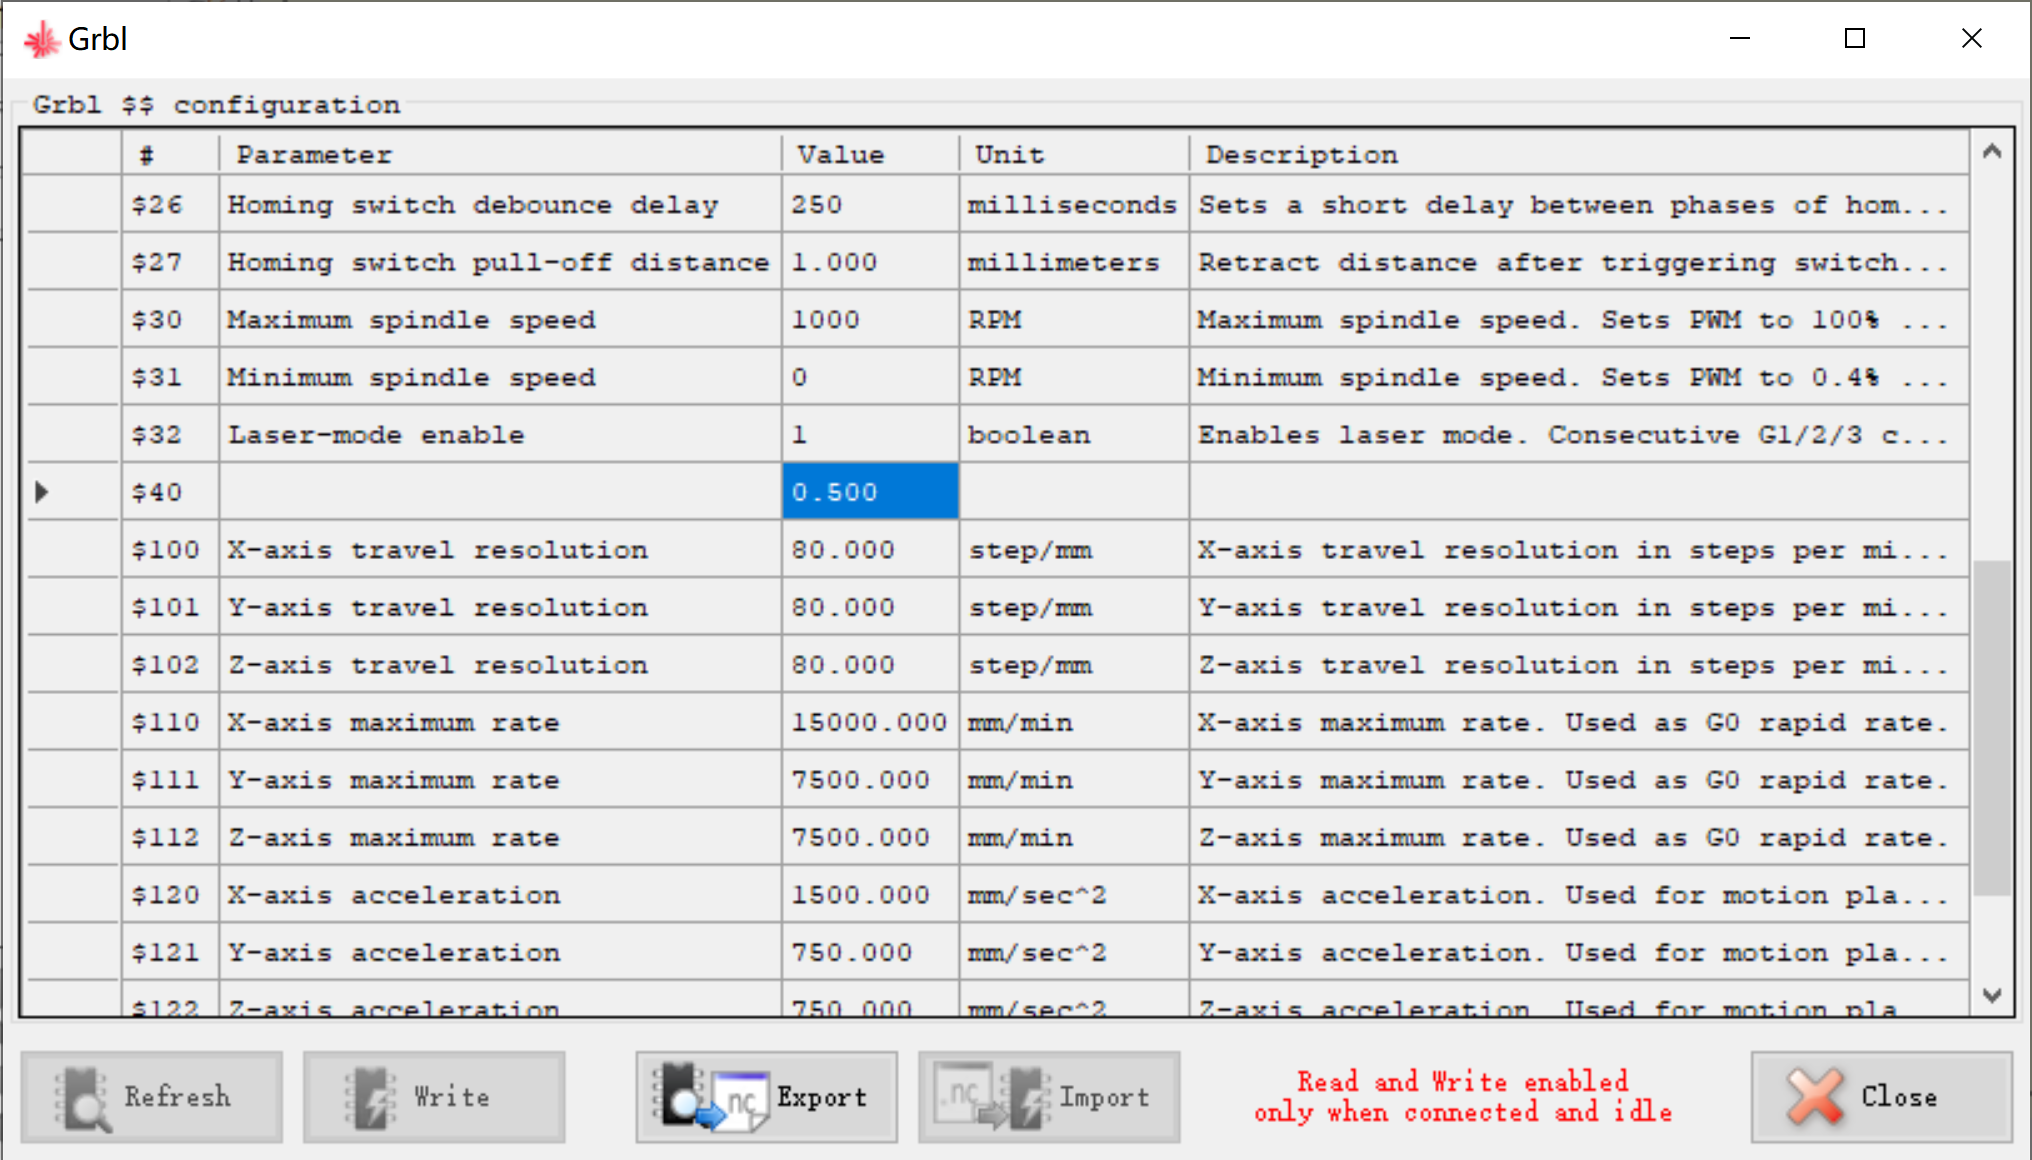
How to set low light intensity in GRBL?
Write any value from 0.08 - 0.5, The value means % laser intensity, please proceed with caution,If you modify the parameters and cannot restore the default firmware, you can re-update the firmware in NEJE Win software.
Please refer to the official instructions for laserGRBL. It should be noted that NEJE 3 Max has added M8, M7 and Door to adapt to laserGRBL. In addition to the low-light settings mentioned above, you need to add M8 to the .nc file to control the air to open, M7 controls the exhaust to open, M9 controls them to close.
Firmware Update
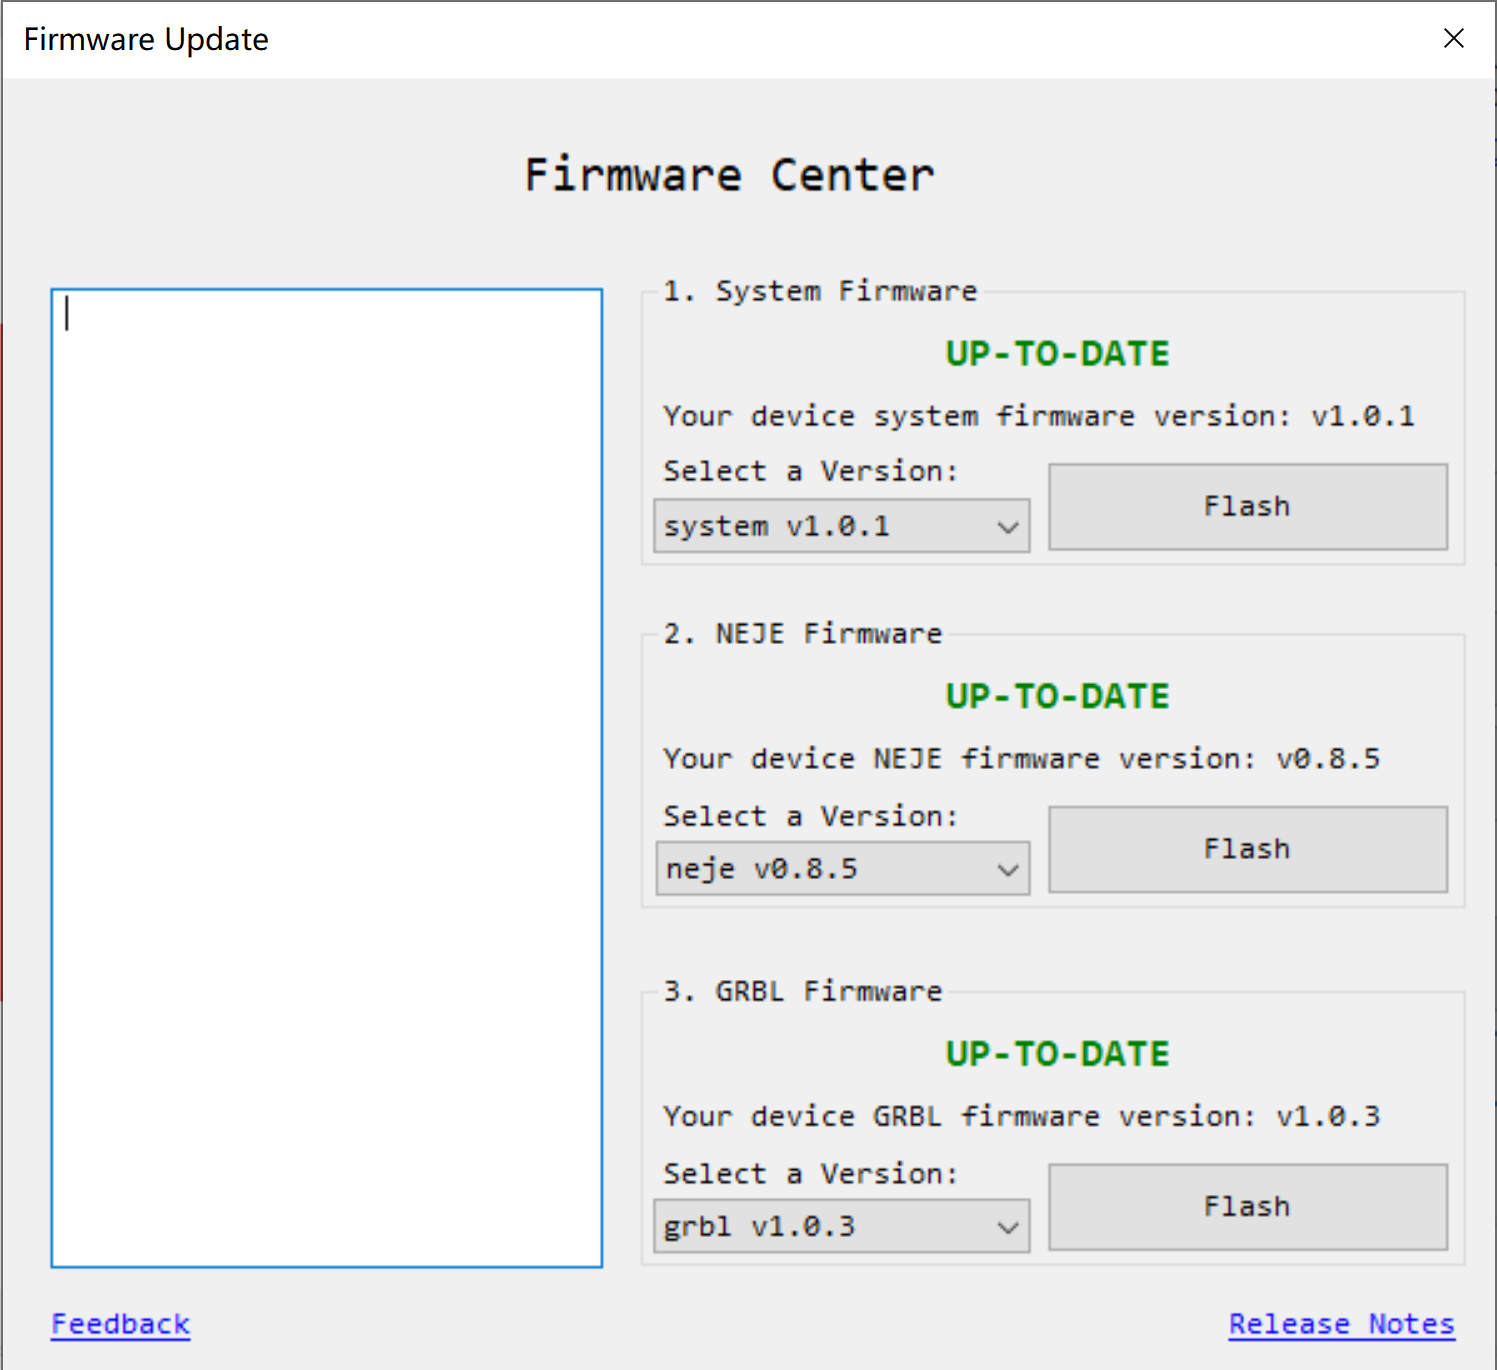
The NEJE software will continue to provide free OTA firmware and software upgrade services to users worldwide, with more practical features and reliable performance to support your creations and manufacturing. When you receive a new device, it is recommended that you first connect the USB cable, open the NEJE Win software, and check for the latest firmware updates.

