Table of Contents
Download
NEJE Controller for Windows:
System Require: win xp SP3, win7 win8, win10
DownLoad windows software NEJE_V4.3_1004_EN.exe
DownLoad N-Scanner V1.0_EN.apk ( only supports Android phone ,work with windows software)

If your operating system does not have the Microsoft 4.0 environment installed, you need to reinstall the operating environment. If the software can be opened directly, you can ignore it:
DownLoad .net framework4.0.exe
NEJE Controller for Mac:
System Require: OS X 10.10 or higher, 64-bit
Step1: DownLoad driver for mac:


Step2: Download software from Mac APP Store
Search for the keyword: “NEJE”

unbox
1 * Engraver Machine
1 * Protective panel
1 * USB Cable
1 * Wrench
1 * Whiteboard Marker
3* Wood Block
3* Paper
Prepare Machine
Unpack: Remove the tape and EPE used for packaging and fixing machines, There is a pearl cotton pad below the bottom plate and behind the radiator.
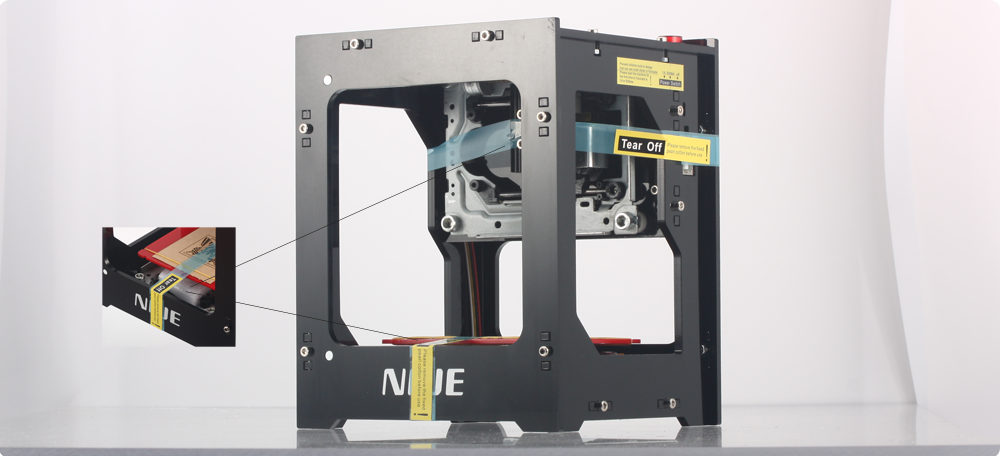
Connect power cable to 5V2A USB power adapter and turn on the top ON/OFF switch, At this point the machine will go into preparation.

Connect the machine to computer: Connect the usb cable to computer.
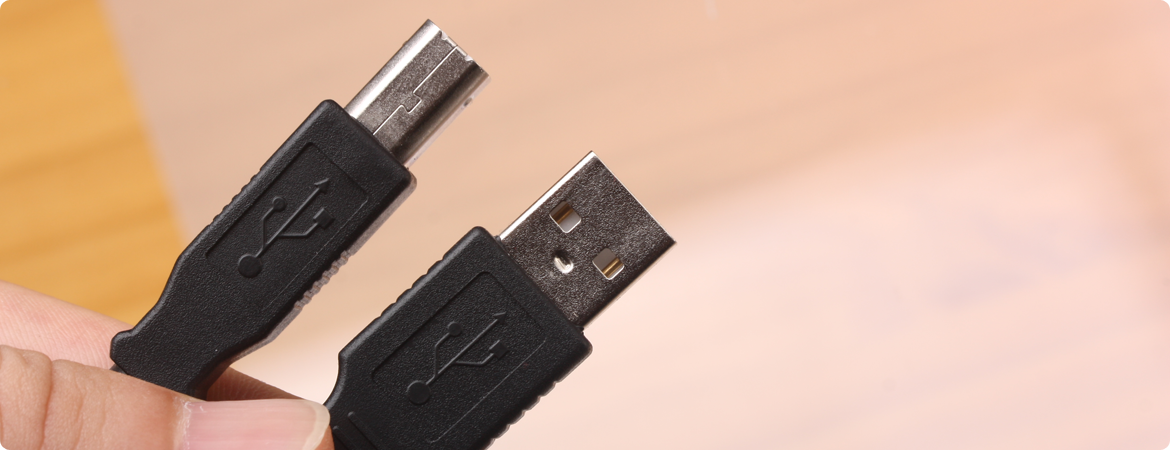
Before opening the software, please connect the usb cable to computer and turn on the ON/OFF switch on the top of the machine.
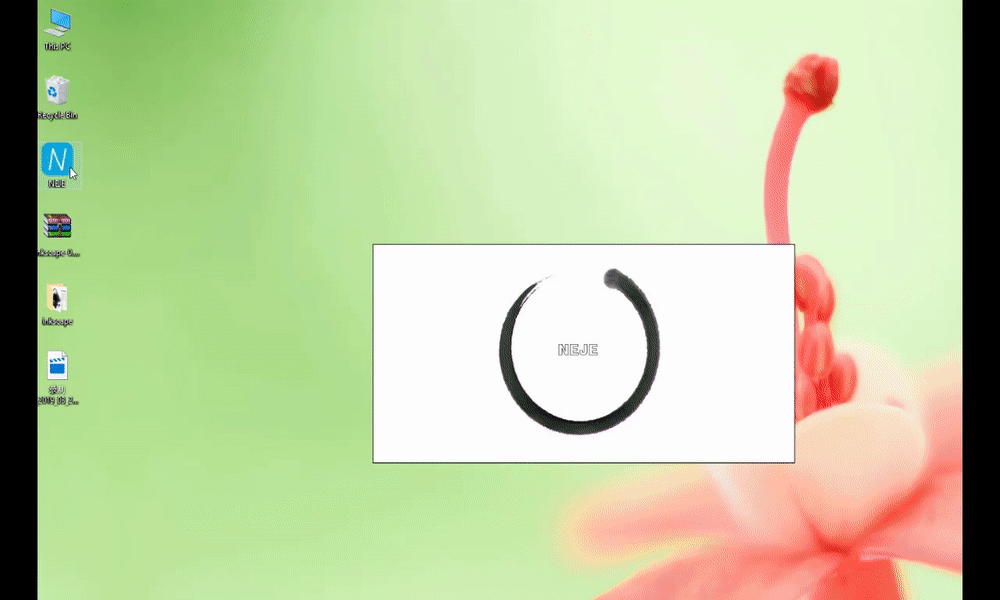
Open Software and connect to machine
auto connect
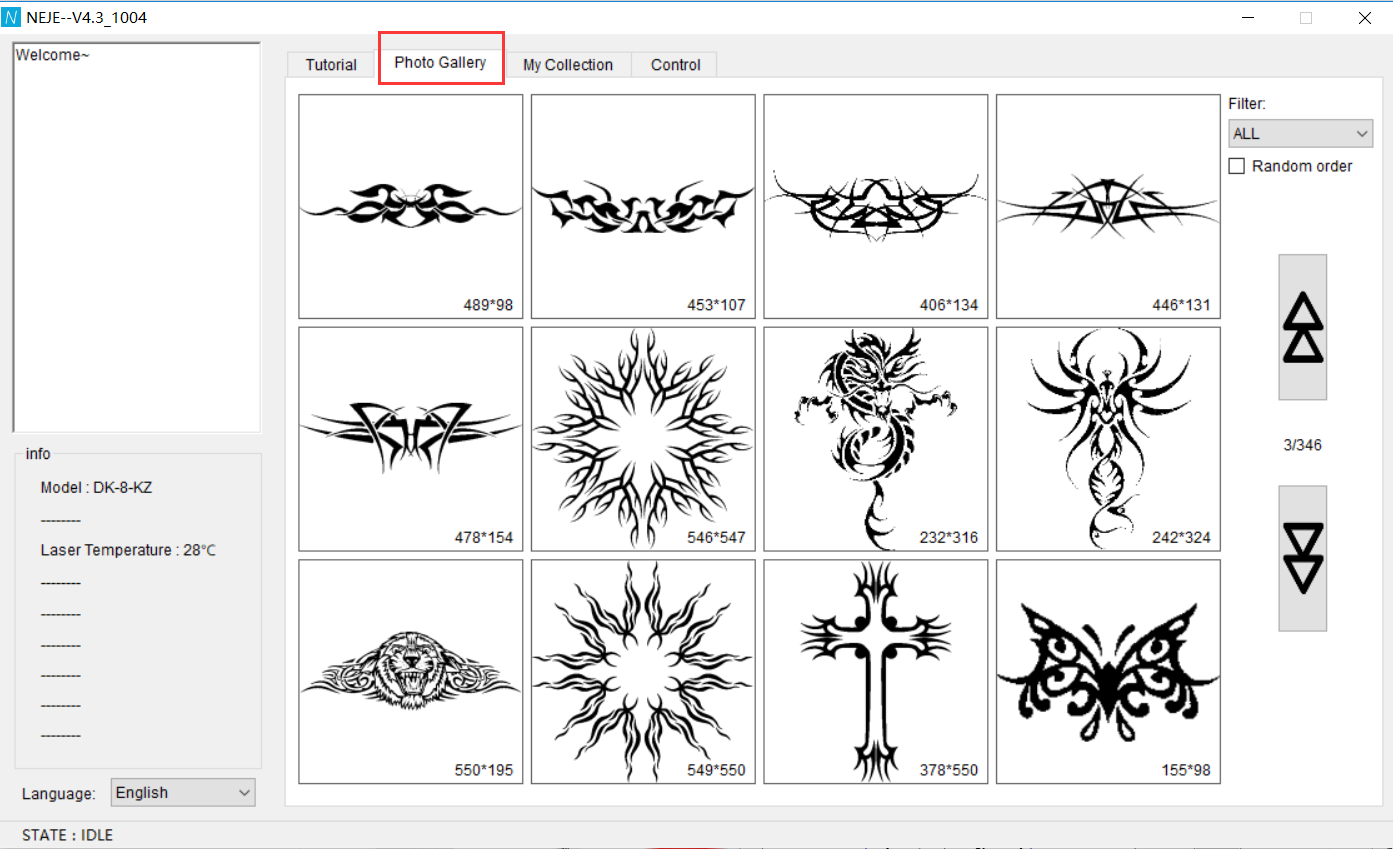
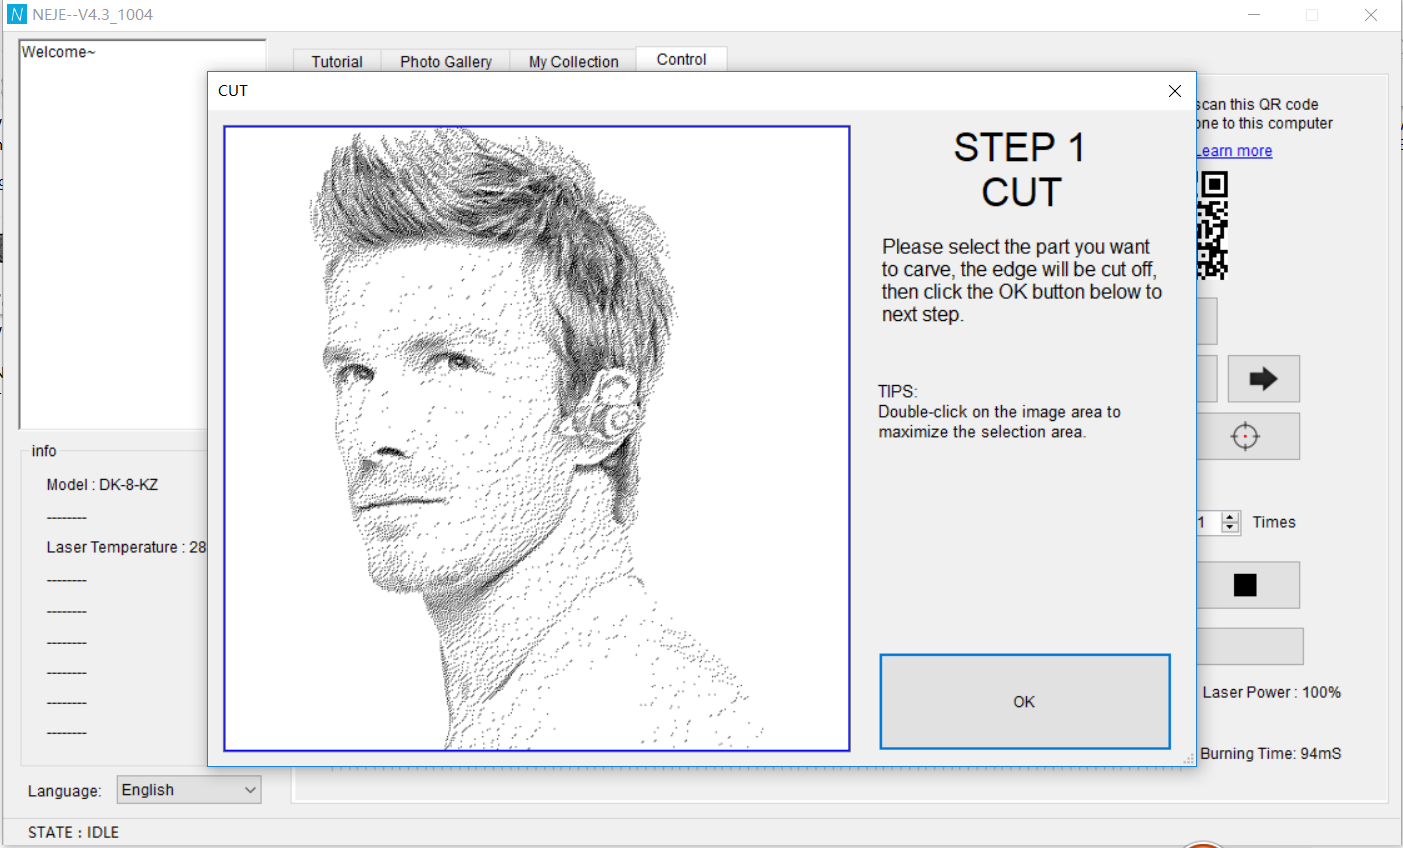
Step 1: Choose a picture from “Photo Gallery” or Drag a picture from your computer into the middle of the control interface.
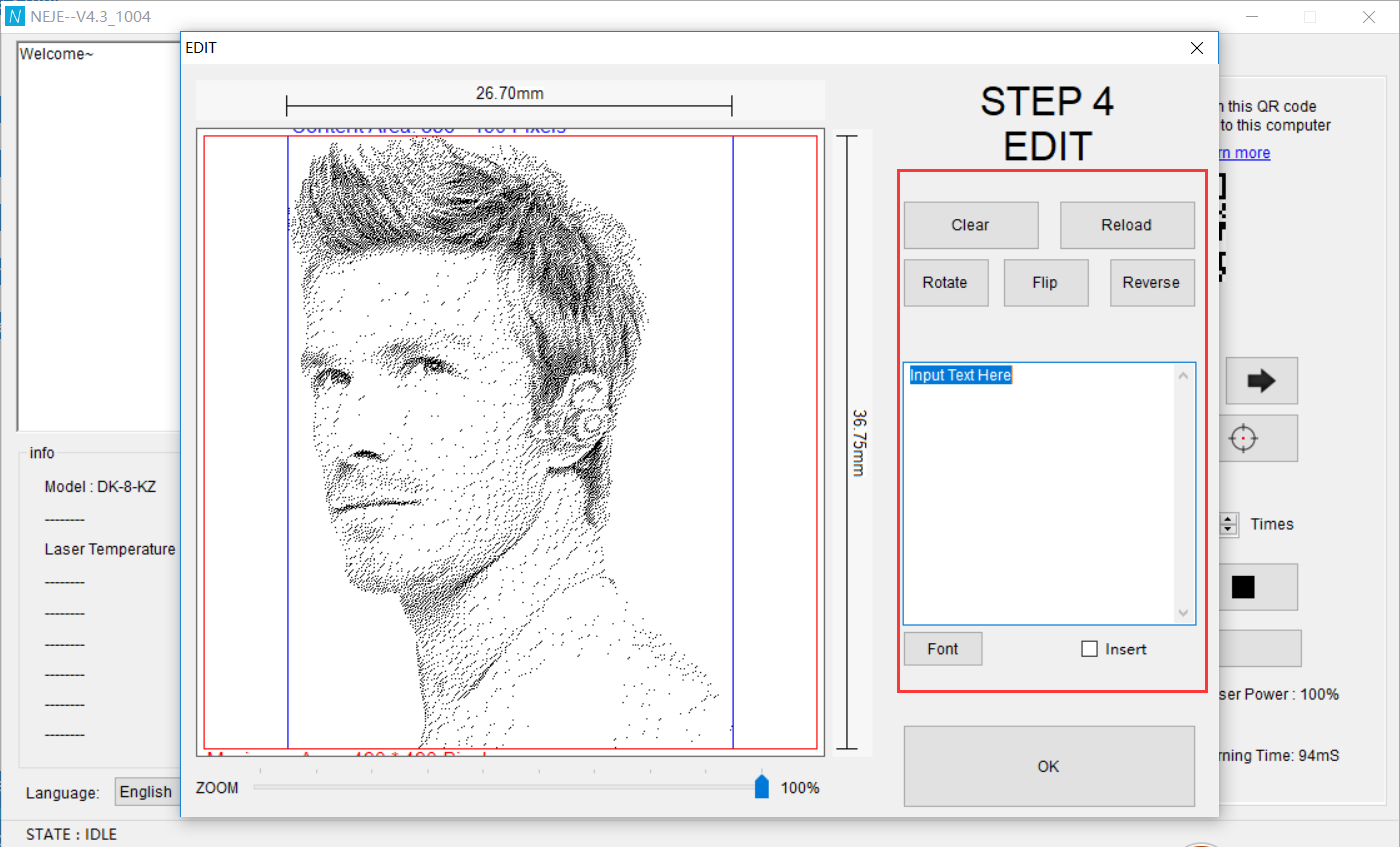
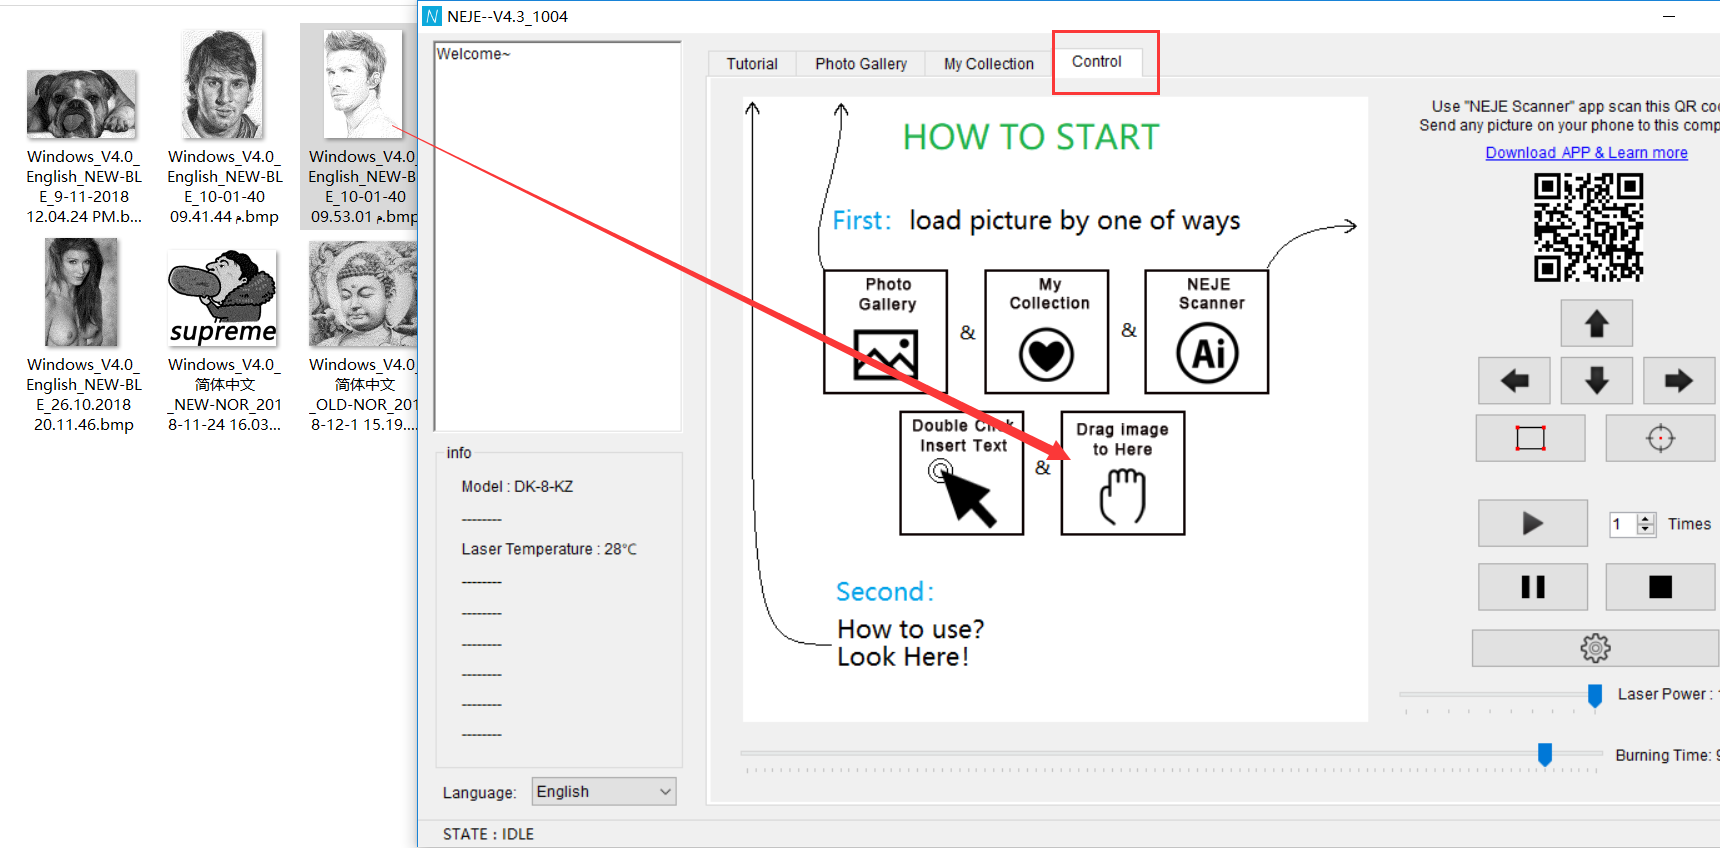 2.Edit image size, insert text, position engraving area.

 3. Set burning time and control engraving.
 When you browse the photo gallery or edit your favorite pictures, you can click the right mouse button to bookmark “My Collection”.
Now, Let's start your first work.
Operation tutorial
Prepare: Adjust the focal length
Step 1:where do you put items underneath it?
Step 2:How do you determine the working area?
Step 3:How do you increase/decrease image size?
Step 4:What should you set the various settings to, based on the working material (ie, depth, power, etc.)
Step 5:How to use the software and NEJE Scanner
FAQ
— What materials can be carved, how to fix materials?
Objective engraving material: “Smooth, Organic, opaque, Non- flame- retardant material For example: Wood, Gray cardboard, bamboo, Leather etc.
Unsuitable engraving material: ” Those material unable to burn &focus“ For example: Pure metal(without coating), transparent plastic, White paper(Astigmatic),PP plastic etc.
Fix the object to be carved with a silicone pad and rubber band or other auxiliary tools.
— Trouble shooting
1.The machine works, but it doesn't carved out?
a.Whether the material is suitable for carving, The machine is engraved by burning, so it is impossible to engrave inorganic materials such as stones. In general, materials that can be Burnt black with a lighter can be used for engraving, but plastics that be added Anti-combustion and pure white paper that aasy astigmatism can't be burned. Some paper can't burned because of adding powder or film.
b.Whether the surface of the engraved material is flat.
c.Whether the object is fixed well.
d.Whether the focal length is adjusted accurately.
e.Is the burning time set properly?.
2.Why does the machine keep hitting a straight line?
The chassis is driven by a stepper motor. If the weight of the load is too heavy, the motor will not be able to complete the drive. Please reduce the weight of the engraving object. 3.The power connection is normal, but the machine does not move?
The mechanical structure may be stuck by foreign objects. For the first time, please remove the fixed mechanical EPE. If the machine lacks maintenance for a long time, you can add a small amount of lubricating oil to maintain the mechanical joint. 4.Laser running to one side?
The mechanical joints have sand-sized foreign bodies that affect the mechanical work, and can quickly slide back and forth to eject foreign objects. 5.Some parts cannot be carved?
It may be that there is a foreign object inside the laser tube that blocks the light path output. You can remove the focusing mirror to check if there is any foreign matter. 6.Have a ghost.
It may be that the engraved object is not fixed, and the displacement occurs when engraving. Please place a silicone anti-slip pad under the engraved object and fix it with a rubber band. 7.Carving half.
It may be that the mechanical structure has been displaced during engraving. Please turn off the power of the machine and restart it, so that the machine can be reset again, and avoid the displacement of the bottom plate or laser during the operation. 8.Engraving depth is not enough.
The material to be engraved, whether the surface of the material is flat, whether it is fixed and flat, whether the focal length is adjusted accurately, whether the burning time is appropriate, and the number of repeated engravings will affect the engraving depth. Please adjust according to the above actual factors. 9.Why are some white papers not carved?
Some white papers are too thin, with flame retardant lime powder, or a plastic film on the surface. These will affect the focus and energy burning. It is recommended to use gray cardboard as the test material. 10.Why are some woods not carved?
All wood can be engraved, please ensure that the surface of the wood is fixed parallel to the laser burning surface, and the curved wood may not work well due to the change of focal length.
— About laser head!
Solid laser head: There's life span for the laser head , and laser type normally are CO2, Multimode high power laser, small solid-state laser, Our DK-BL uses Nichia blue 405nm single-mode laser diode, the official service life is 10000 hours, the normal use in about 3 months -1 years, but it's also closely related to how you use it .(main factors include : The temperature, time intensity, current, voltage, anti static treatment, adverse rate etc. )The laser module quality control technology
Laser module quality control process: The laser modules used by Our DK-BL is the best one that with constant current drive modules, along with a stable cooling system. And every single-mode module has being through 3 hours aging tested. and are well packaged before outgoing. So the machine that every user received had PASS a serial of reliability test. but even so, there may be 0.05% chance that the machine you receive may have the laser durability problem. In this case, please confirm within 3 days, and feed back to the dealer, we can arrange replacement for you for free.
What about the laser head life? There’s service life for all laser products, the laser tube official life is 100,000 hours, but the actual life will depends on actual usage. In general, 3 Month - 1 year, or may be many years.
How to ensure the life of the laser? In order to protect the life of the laser, We do not recommend long-times use. How to judge the laser head burned?
1.When the machine is working, the light was significantly weakened.
2.When the machine is working, the light scattered, unable to focus and the light weakened.
3.The burning time, Carving material, focal length all ok, but can't burn out the object.
— How to replace the old laser tube!
Step1: use the L wrench Screw the screws on the back of the machine and open the back of panel.
Step2: use the L wrench Screw the screws on the radiator. and replace the laser tube.
— How to replace the motor assembly!
Step1: use the L wrench Screw the screws on the back of the machine and open the back of panel.
Step2: Remove the M6 large nut on the back, remember the thickness of the gasket, do not reverse it.
— Caution
1.The machine certified to CE\FCC \FDA certification, the radiation values far below the EU and the United States standards, You may rest assured to use
2.Our machine laser energy is not that huge enough to damage you if hand or other part of body stay in the curving scope accidentally during curving, but, you’d better be careful since it’s abnormal operation of machine. We can’t assure it’s no harm definitely.
3.Do not take out the laser head, and exposure to body!
4.Do not use in where the children can touch!
5.Keep away from flammable and explosive materials!
6.There’s an emergency pause button designed on the top of machine that can be used in an emergency!
— Maintain
● Avoid prolonged exposure to dusty environments
● If you don't use it for a long time, wrap it up as best as possible and avoid dust affecting machine performance.
● Put it on a safe place to avoid dropping.
● Avoid working in a dry environment to avoid damage to the machine caused by static electricity.
● Add a little of butter on the slide. If you don't use the machine long time.